Geodata Customizing Process
Introduction
The current process of Geodata Publishing uses a software development approach to integrate changes in the different components of the Geodata Stack Deployments.
These components, that are directly relevant, are:
- The Geodata Database The Geodata database uses PostgreSQL as Database Management System (DBMS). Each used database has the PostGIS extension activated. The DBMS supports with this extension several geospacial features, like recalculation between different Coordinate Reference Systems (CRS) or special geospatial queries. Currently two different databases are in use. These are used to differentiate between different leading system (stages) for different datasets. A seperation of different Schemas per database is planned to enable seperated dataspaces with seperate rights per dataspace and user group.
- The Geoportal The Geoportal is run on the Masterportal software. The Software is fully running in the browser of the user. The Standard Masterportal uses static configuration files to customize features and content of the portal. If no backend is used (see next component), these configuration files are published by building a new container images of the Masterportal incl. these configuration files.
- The Geoportal Backend As a project-specific extension, a new backend was implemented. The backend hosts the above described masterportal configuration files. These files are filtered user-specific based on the rights of the user. The Masterportal Webserver is reconfigured to load the needed files from the backend instead from the static file definitions on the Masterportal webserver. These configuration files are published by building a new container image of the Geoportal backend incl. these configuration files.
- The Print Backend Mapfish as print backend is deployed as part of the stack. The templates can be maintained in the folder mapfish_print of the repository.
The Geodata Server Geoserver Server is used as geodata server. Content is maintained on testing instance and replicated to production as needed. The Geoserver is not running locally
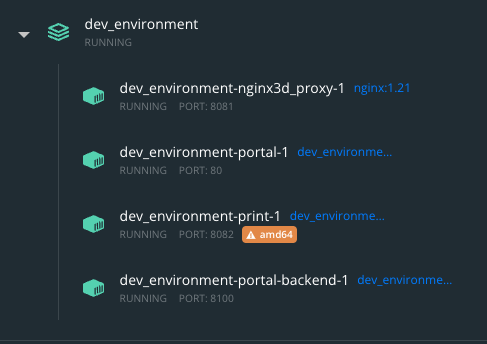
At runtime, the stack looks like this in the docker desktop dashboard:
Future process
The publishing process looks like this (Bold items are new):
1. (Offline*) Create an idea for new datasets or datasets, that should be changed
3. (Gitlab) Create ticket to document planned changes
4. (Gitlab) Create branch with reference to ticket
5. (Git) Clone or pull the current geodata_customizing project
7. (Geoserver) Integrate data in the geoserver services
10. (Git) or (Gitlab Web IDE) commit changes and push them
11. (Git) Commit and push changes to new branch
12. (Gitlab) Create merge request for testing stage
13. (Gitlab) Optional step: Resolve merge conflicts
14. (Gitlab) Build containers and deploy to testing
15. (testing Stage) Test changes in testing environment
16. (Gitlab) Create merge request for prod stage**
17. (Gitlab) Build containers and deploy to prod**
(* Offline means in this case: not as part of the data platform)
The new steps in the daily use are explained in the next chapters. Regarding Gitlab issue handling, the Gitlab documentation itself is very good and detailed. In this description, only the basics are described and assumed, that Gitlab handling is known.
1. (Offline*) Create an idea for new datasets or datasets, that should be changed
Unchanged to current process
2. (Offline*) Prepare data
Unchanged to current process
3. (Gitlab) Create ticket to document planned changes
-
Open the Gitlab Planning Board Link: Issue Planning
-
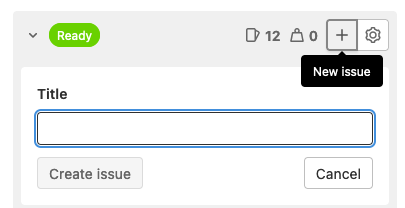
Create a new Issue Click the
+Symbol in the accoding column to create a new ticket.
-
Give the new ticket a speaking title
-
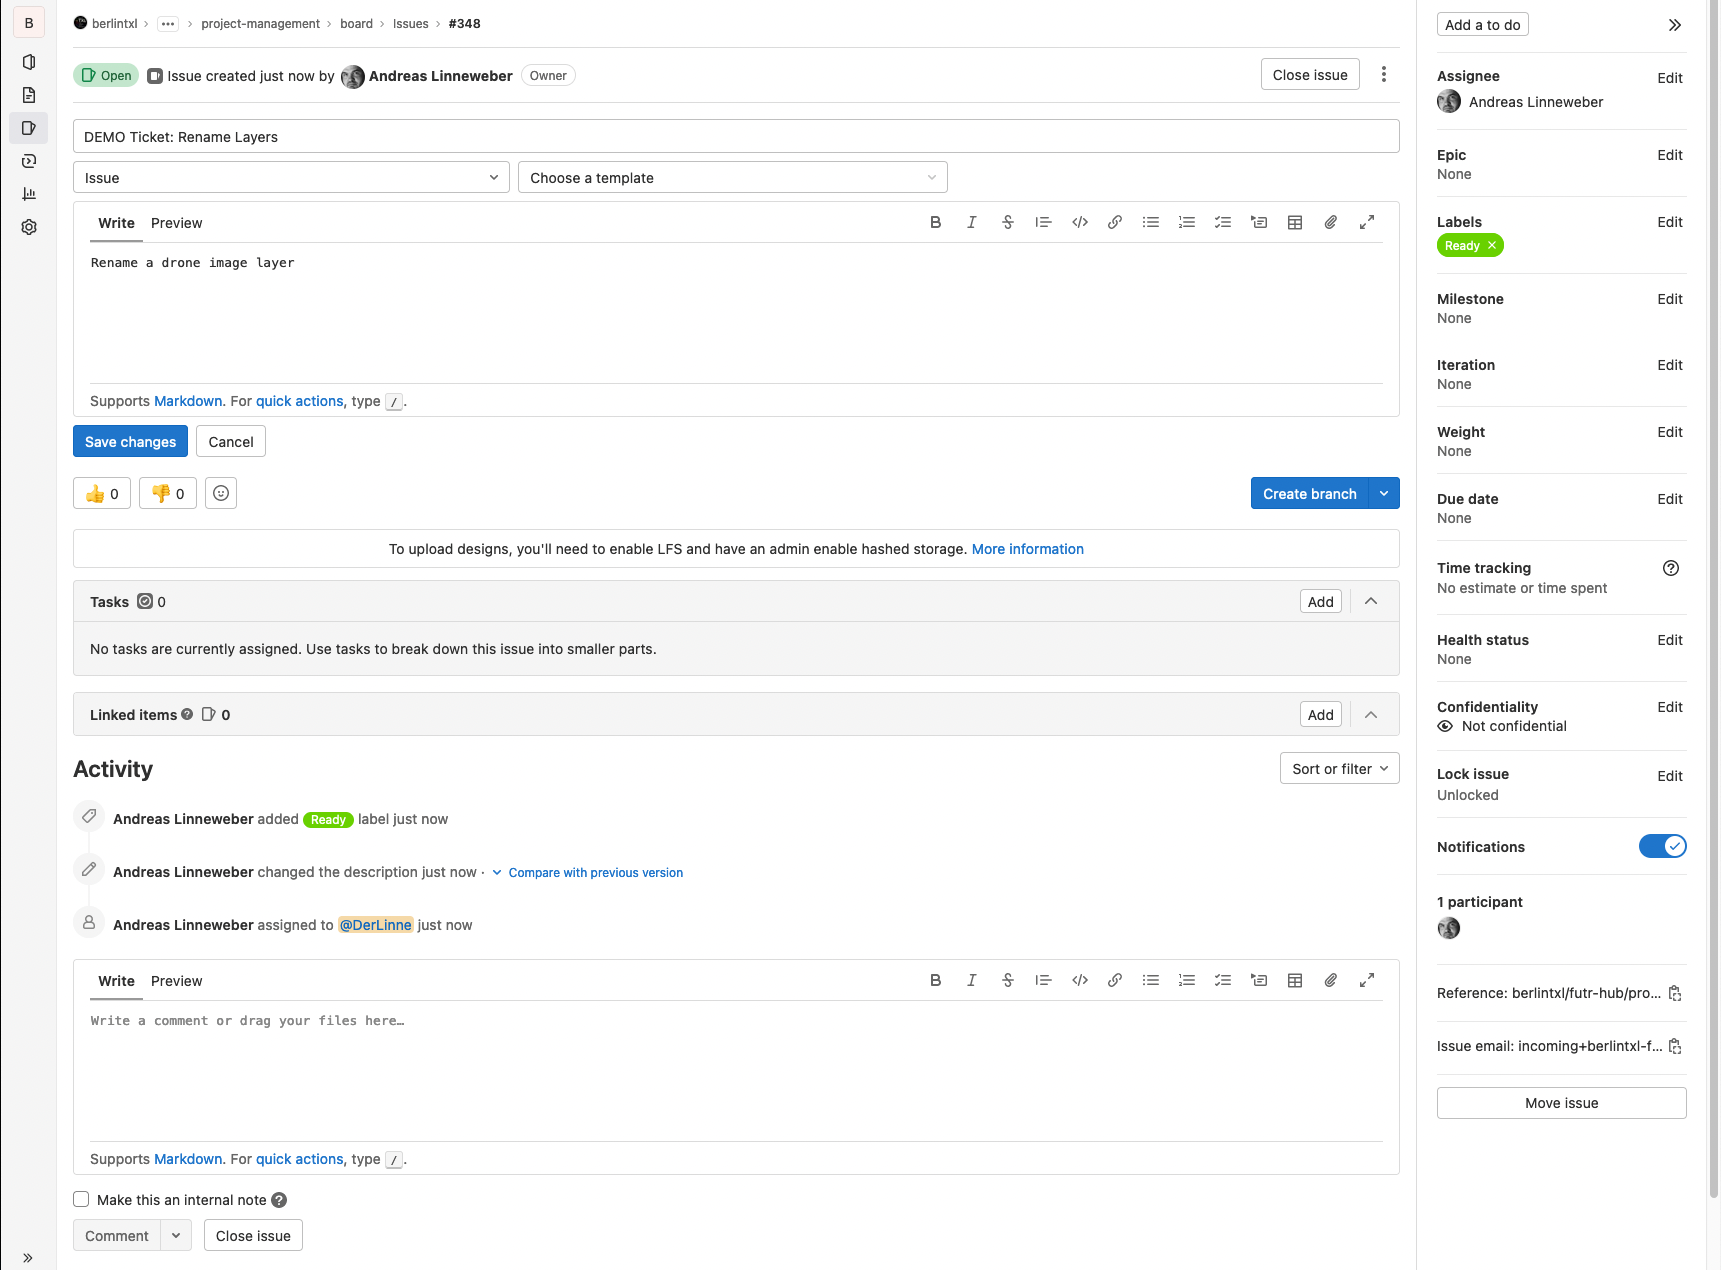
Open the new ticket and describe your planned changes
4. (Gitlab) Create branch with reference to ticket
Open the according page in the geodata_customizing repository.
Link: Geodata Customizing - Branches
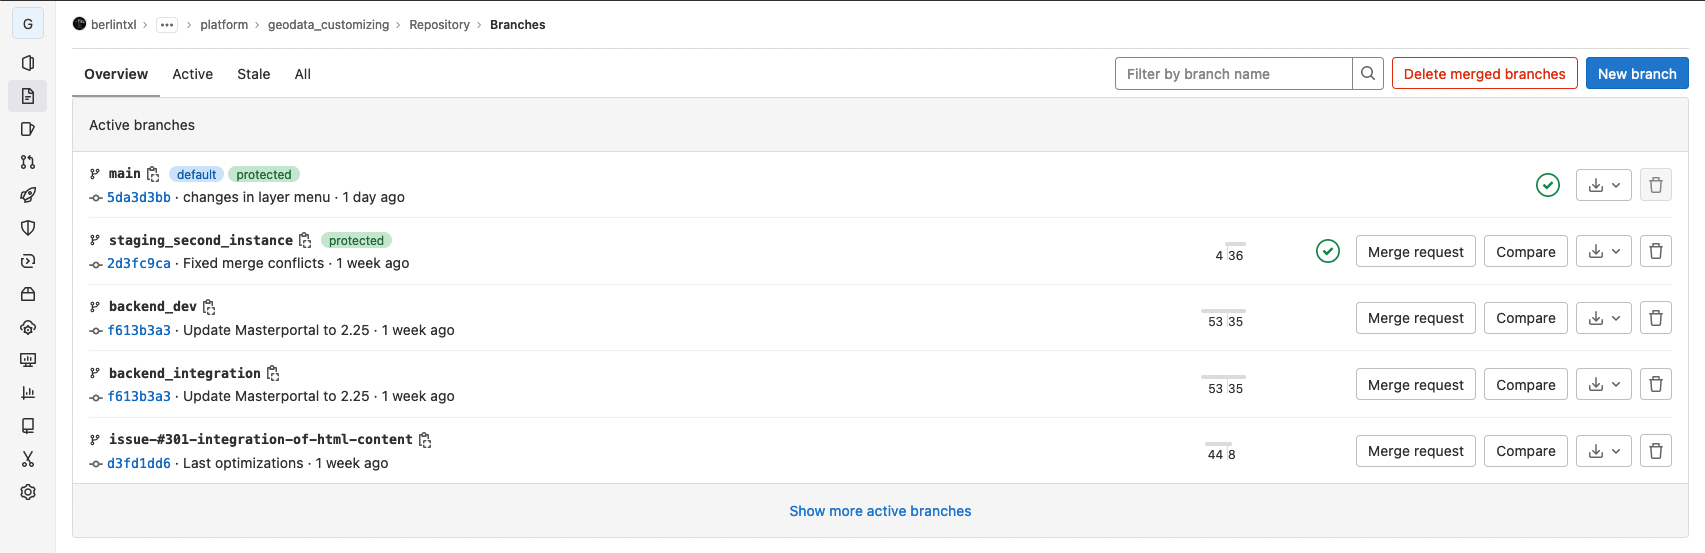
Click on New Branch, enter your issue number followed by the title as name and select the source branch to start from.
The source branch should normally be the testing branch, because this is the most up to date version of the deployments.
Hint: The title is later used to switch to the branch - replace whitespaces and special characters with underscores make the later handling easier.
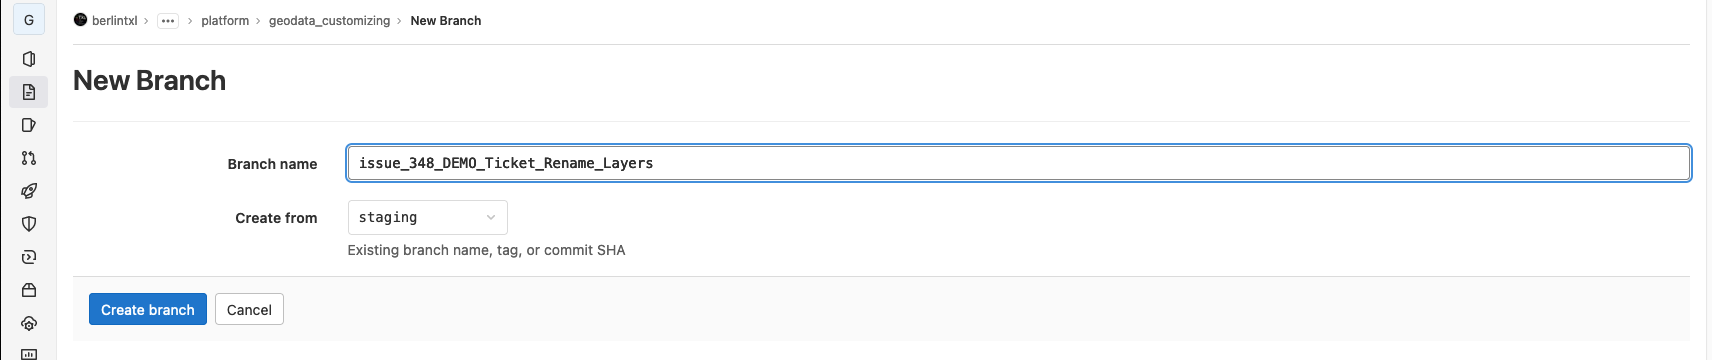
With a click on the button Create branch the branch is created.
5. (Git) Clone or pull the current geodata_customizing project
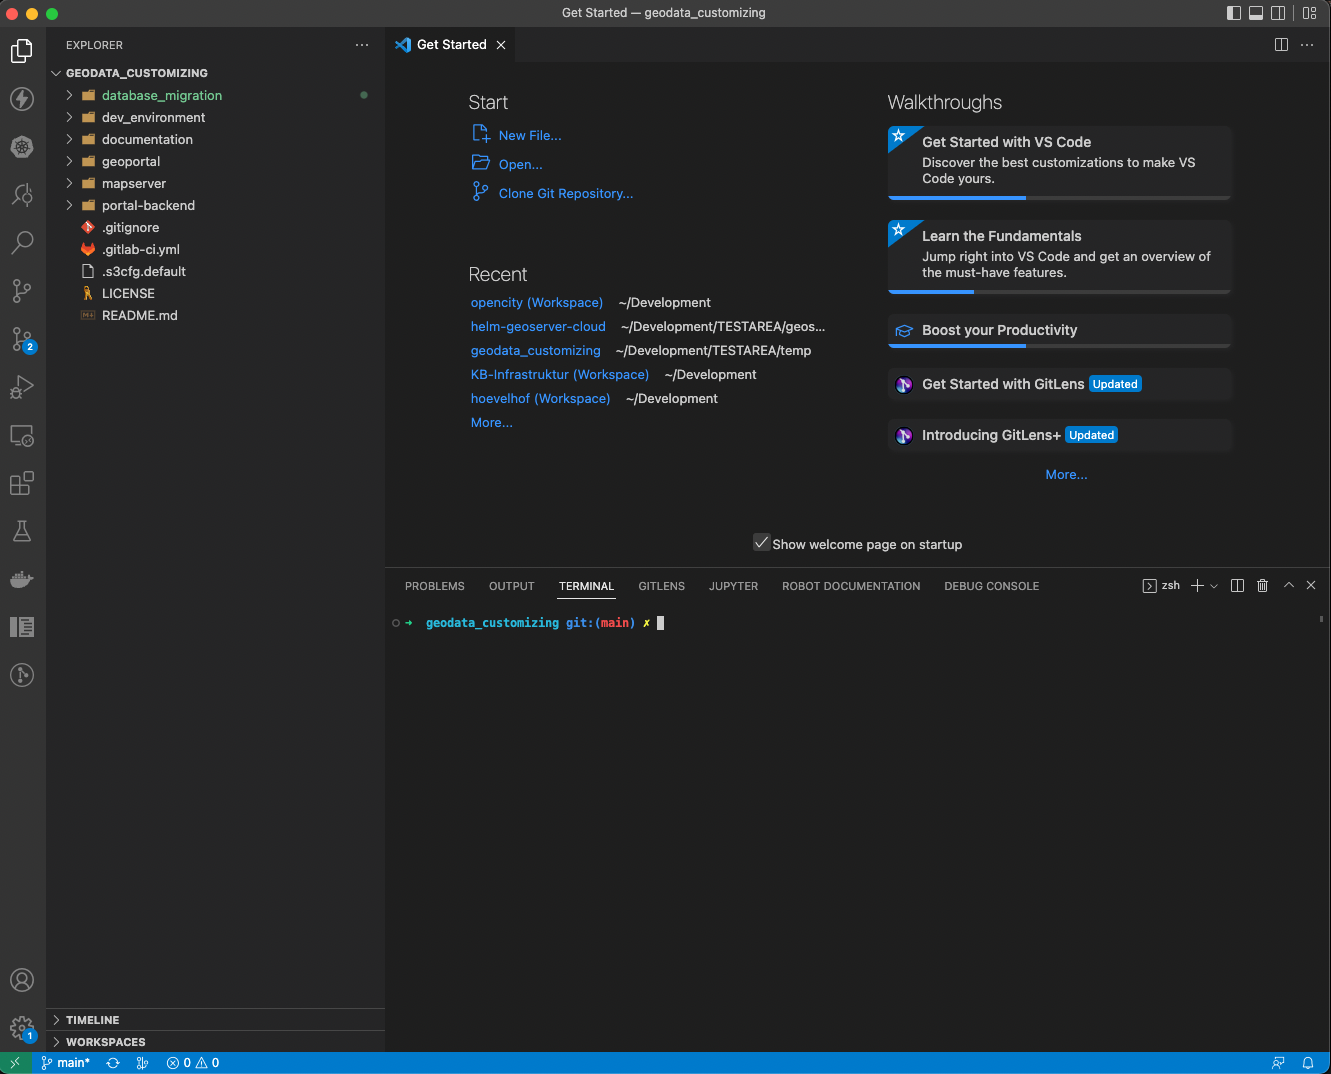
Switch to your local development environment (the full setup is described here).
The intitial cloning is described in the linked documentation. So we start here from an alredy setup environment.
By default, your are working on the testing branch.
Update your local repository:
➜  geodata_customizing git:(testing) ✗ git pull
remote: Enumerating objects: 65, done.
remote: Counting objects: 100% (65/65), done.
remote: Compressing objects: 100% (42/42), done.
remote: Total 45 (delta 28), reused 2 (delta 0), pack-reused 0
Entpacke Objekte: 100% (45/45), 125.29 KiB | 1.46 MiB/s, fertig.
Von https://gitlab.com/berlintxl/futr-hub/platform/geodata_customizing
   f4a73a7..5da3d3b  testing                                -> origin/testing
 * [neuer Branch]    backend_dev                         -> origin/backend_dev
 * [neuer Branch]    issue_348_DEMO_Ticket_Rename_Layers -> origin/issue_348_DEMO_Ticket_Rename_Layers
Aktualisiere f4a73a7..5da3d3b
Fast-forward
 geoportal/static/config.json                         |   303 +-
 "geoportal/static/localdata/\303\226PNV2022.geojson" |     1 +
 geoportal/static/resources/img/schild_baustelle.png  |   Bin 0 -> 767 bytes
 geoportal/static/resources/img/schild_sperrung.png   |   Bin 0 -> 666 bytes
 geoportal/static/resources/img/schild_warnung.png    |   Bin 0 -> 683 bytes
 geoportal/static/resources/services-internet.json    |  1184 +++++-
 geoportal/static/resources/style_v3.json             |   159 +
 geoportal/static/styles.css                          |     3 +-
 15 files changed, 20533 insertions(+), 16233 deletions(-)
 create mode 100644 "geoportal/static/localdata/\303\226PNV2022.geojson"
 create mode 100644 geoportal/static/resources/img/schild_baustelle.png
 create mode 100644 geoportal/static/resources/img/schild_sperrung.png
 create mode 100644 geoportal/static/resources/img/schild_warnung.png
 create mode 100644 mapserver/data/fzn/project.qgs~
➜  geodata_customizing git:(testing) ✗
Use the command git pull and your output will look similar to this. Most important are the lines starting with * [neuer Branch].
To make sure, that always the correct portal_backend is used, please execute the command git submodule update --init --recursive on a regular basis.
These lines show your newly created branch was downloaded.
6. (Git) Checkout new branch
In Git, switching to a branch is called checkout. Run the following command to switch to the branch you have created just now.
➜  geodata_customizing git:(testing) ✗ git checkout issue_348_DEMO_Ticket_Rename_Layers
Branch 'issue_348_DEMO_Ticket_Rename_Layers' folgt nun 'origin/issue_348_DEMO_Ticket_Rename_Layers'.
Zu neuem Branch 'issue_348_DEMO_Ticket_Rename_Layers' gewechselt
➜  geodata_customizing git:(issue_348_DEMO_Ticket_Rename_Layers) ✗
Now you have switched to the new branch and you can start making your changes.
7. (Geoserver) Integrate data in Geoserver services
Unchanged to current process
8. (VSCode) Edit portal-backend/service-internet.json to add new layer or adjust existing one
Unchanged to current process
9- (VSCode) Edit portal-backend/config.json to add new layer or adjust existing one in themeconfig of the portal
Unchanged to current process
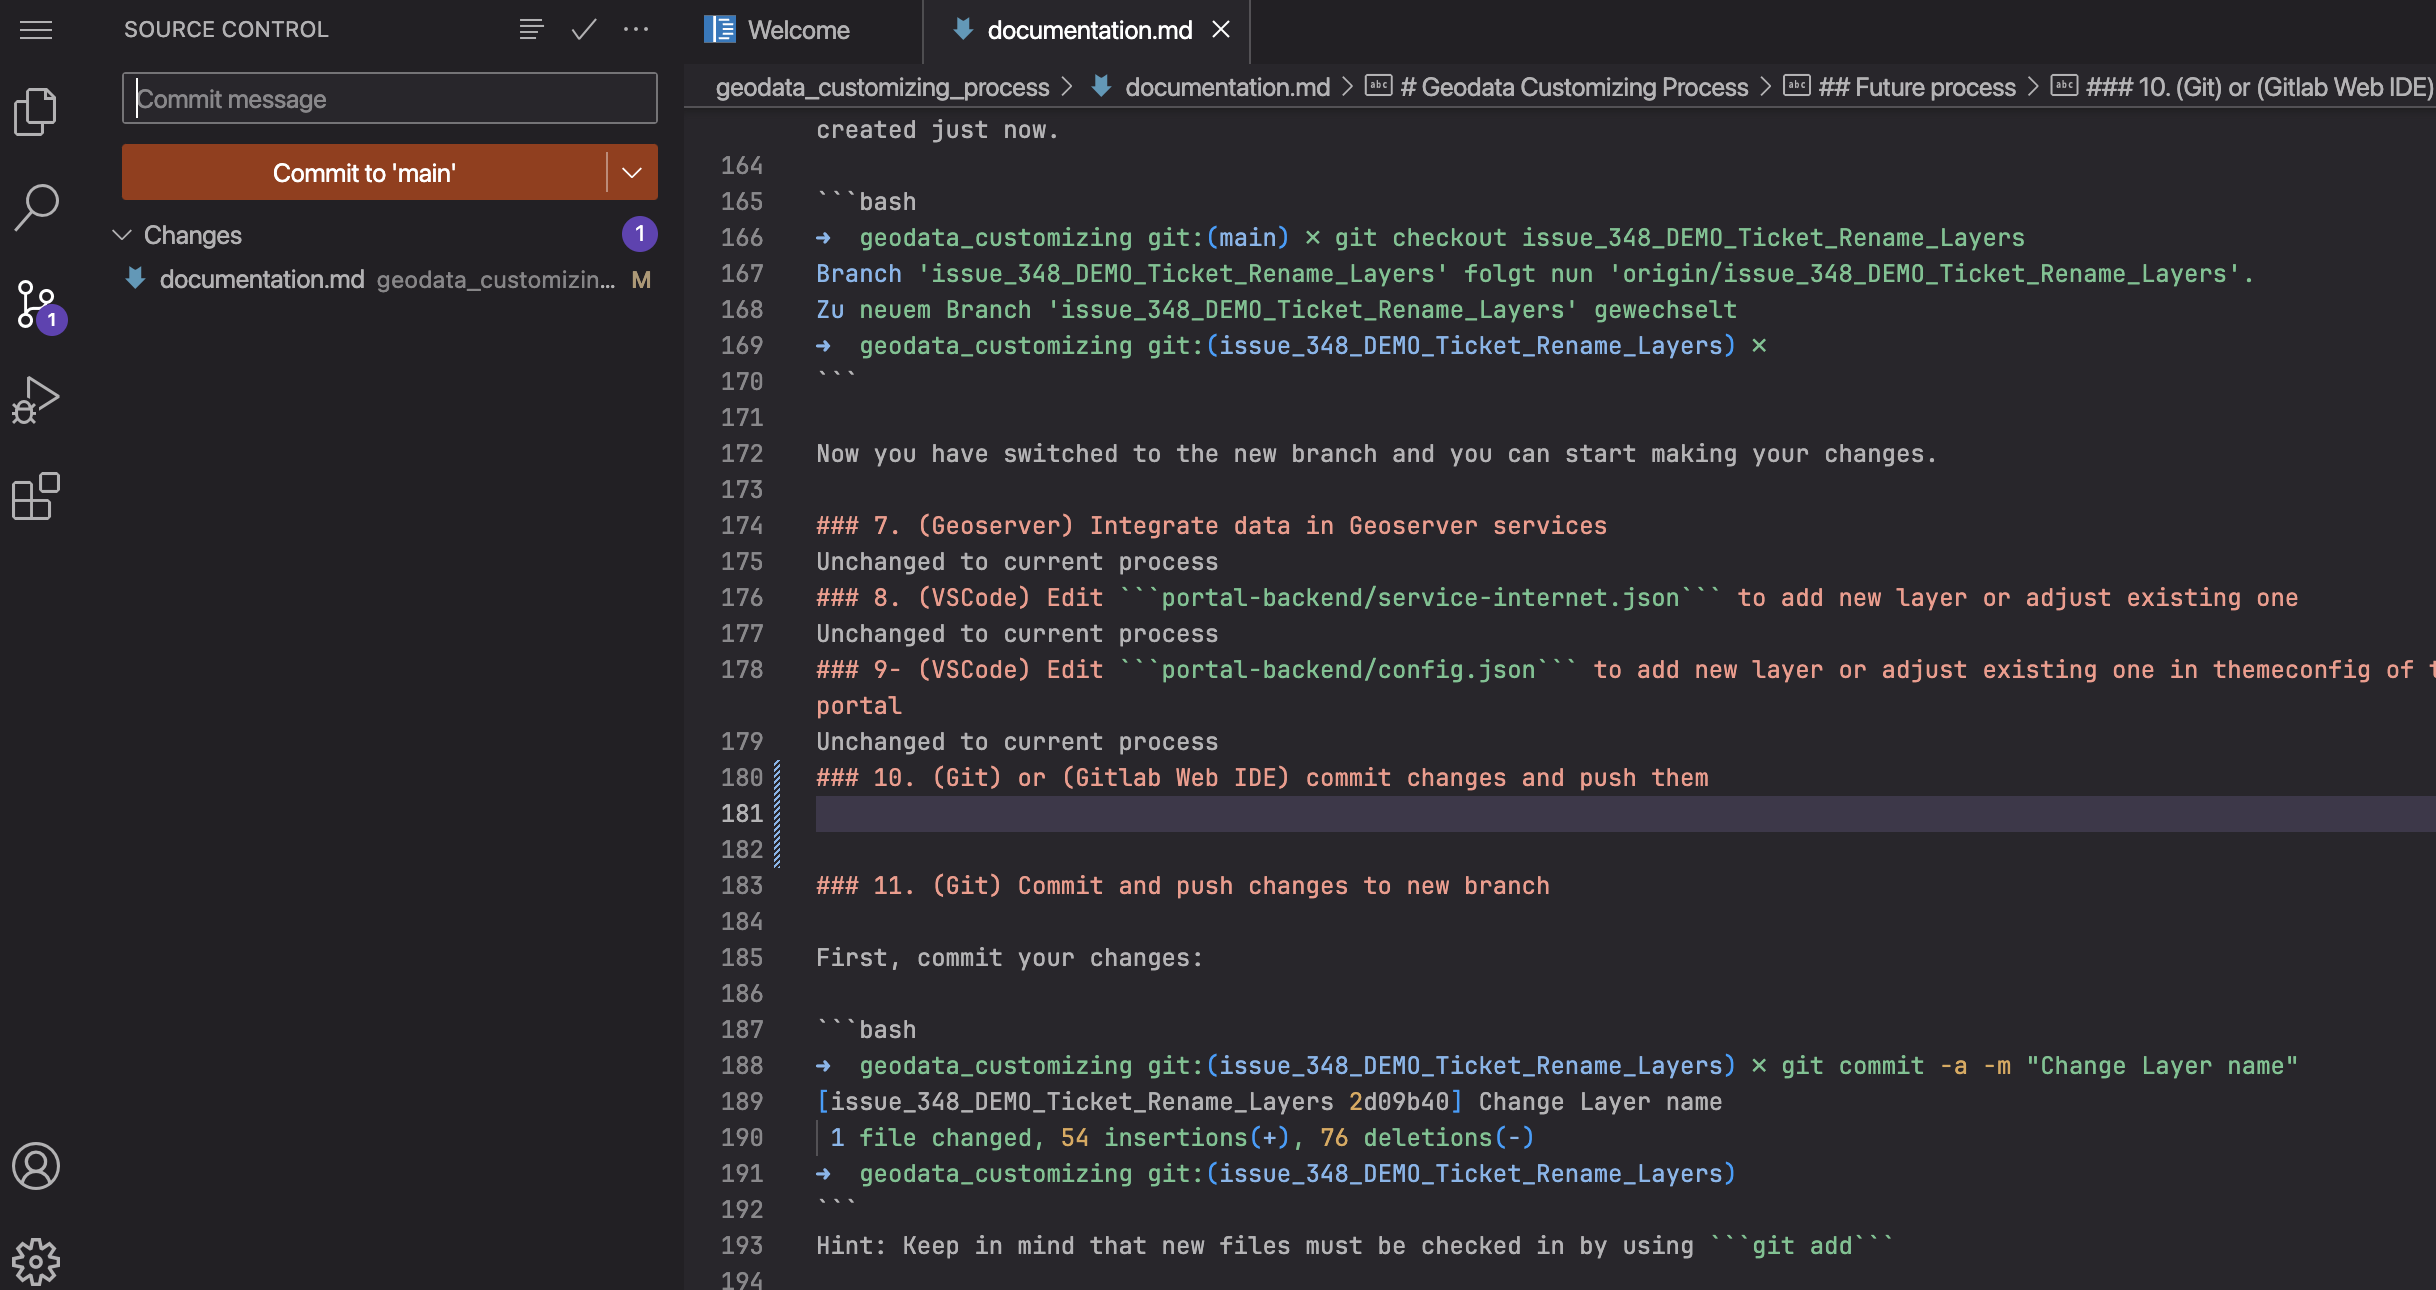
10. (Git) or (Gitlab Web IDE) commit changes and push them
Click in WebIDE on Source Control, in the next window add a commit comment and hit commit
After the push is done Gitlab starts the pipeline and your individual portal is build it should be reachable after a short while under
https://geoportal.futr-hub.de/portal-xy/. the xy in this url should be your initials.
11. (Git) Commit and push changes to new branch
First, commit your changes:
➜  geodata_customizing git:(issue_348_DEMO_Ticket_Rename_Layers) ✗ git commit -a -m "Change Layer name"
[issue_348_DEMO_Ticket_Rename_Layers 2d09b40] Change Layer name
 1 file changed, 54 insertions(+), 76 deletions(-)
➜  geodata_customizing git:(issue_348_DEMO_Ticket_Rename_Layers)
Hint: Keep in mind that new files must be checked in by using git add
Next, push your changes to Gitlab.
➜  geodata_customizing git:(issue_348_DEMO_Ticket_Rename_Layers) ✗ git push
Objekte aufzählen: 5, fertig.
Zähle Objekte: 100% (5/5), fertig.
Delta-Kompression verwendet bis zu 8 Threads.
Komprimiere Objekte: 100% (3/3), fertig.
Schreibe Objekte: 100% (3/3), 604 Bytes | 604.00 KiB/s, fertig.
Gesamt 3 (Delta 2), Wiederverwendet 0 (Delta 0), Pack wiederverwendet 0
remote:
remote: To create a merge request for issue_348_DEMO_Ticket_Rename_Layers, visit:
remote:   https://gitlab.com/berlintxl/futr-hub/platform/geodata_customizing/-/merge_requests/new?merge_request%5Bsource_branch%5D=issue_348_DEMO_Ticket_Rename_Layers
remote:
To https://gitlab.com/berlintxl/futr-hub/platform/geodata_customizing.git
   f68bdaf..2d09b40  issue_348_DEMO_Ticket_Rename_Layers -> issue_348_DEMO_Ticket_Rename_Layers
➜  geodata_customizing git:(issue_348_DEMO_Ticket_Rename_Layers) ✗
After some minutes (max 10) the changes are available in your personal testing environemt.
https://geoportal.futr-hub.de/portal-<userinitials>
So for Maximimiliane Mustermann this would be:
https://geoportal.futr-hub.de/portal-mm
12. (Gitlab) Create merge request for testing stage
The step before only saved the new changes to the remote repository. This step does not trigger any deployment.
To start this process, a merge request is needed. The easiest way to create one is using the link, that is part of the git push response in the termimal from the previous step.
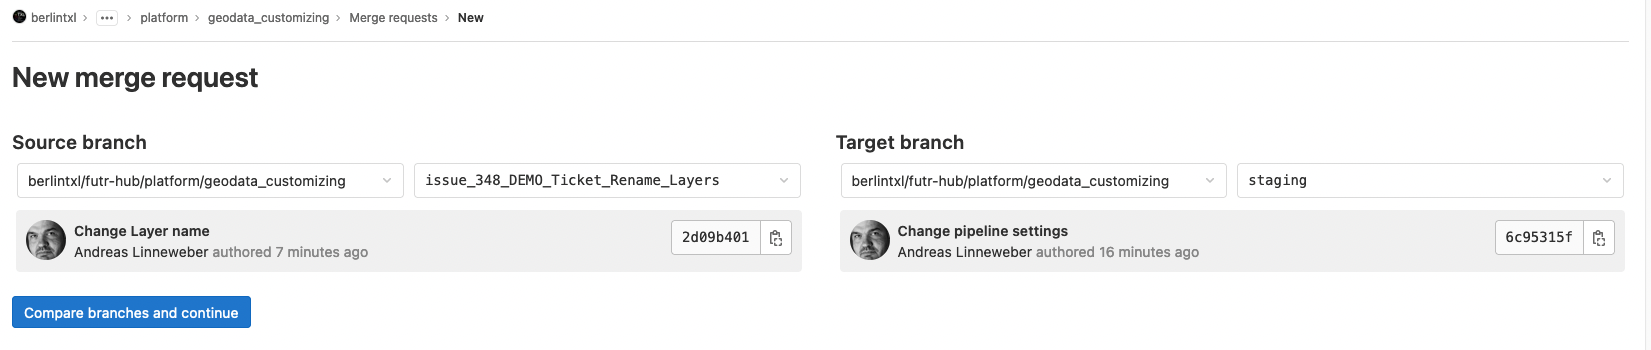
When using the link, the following form opens:
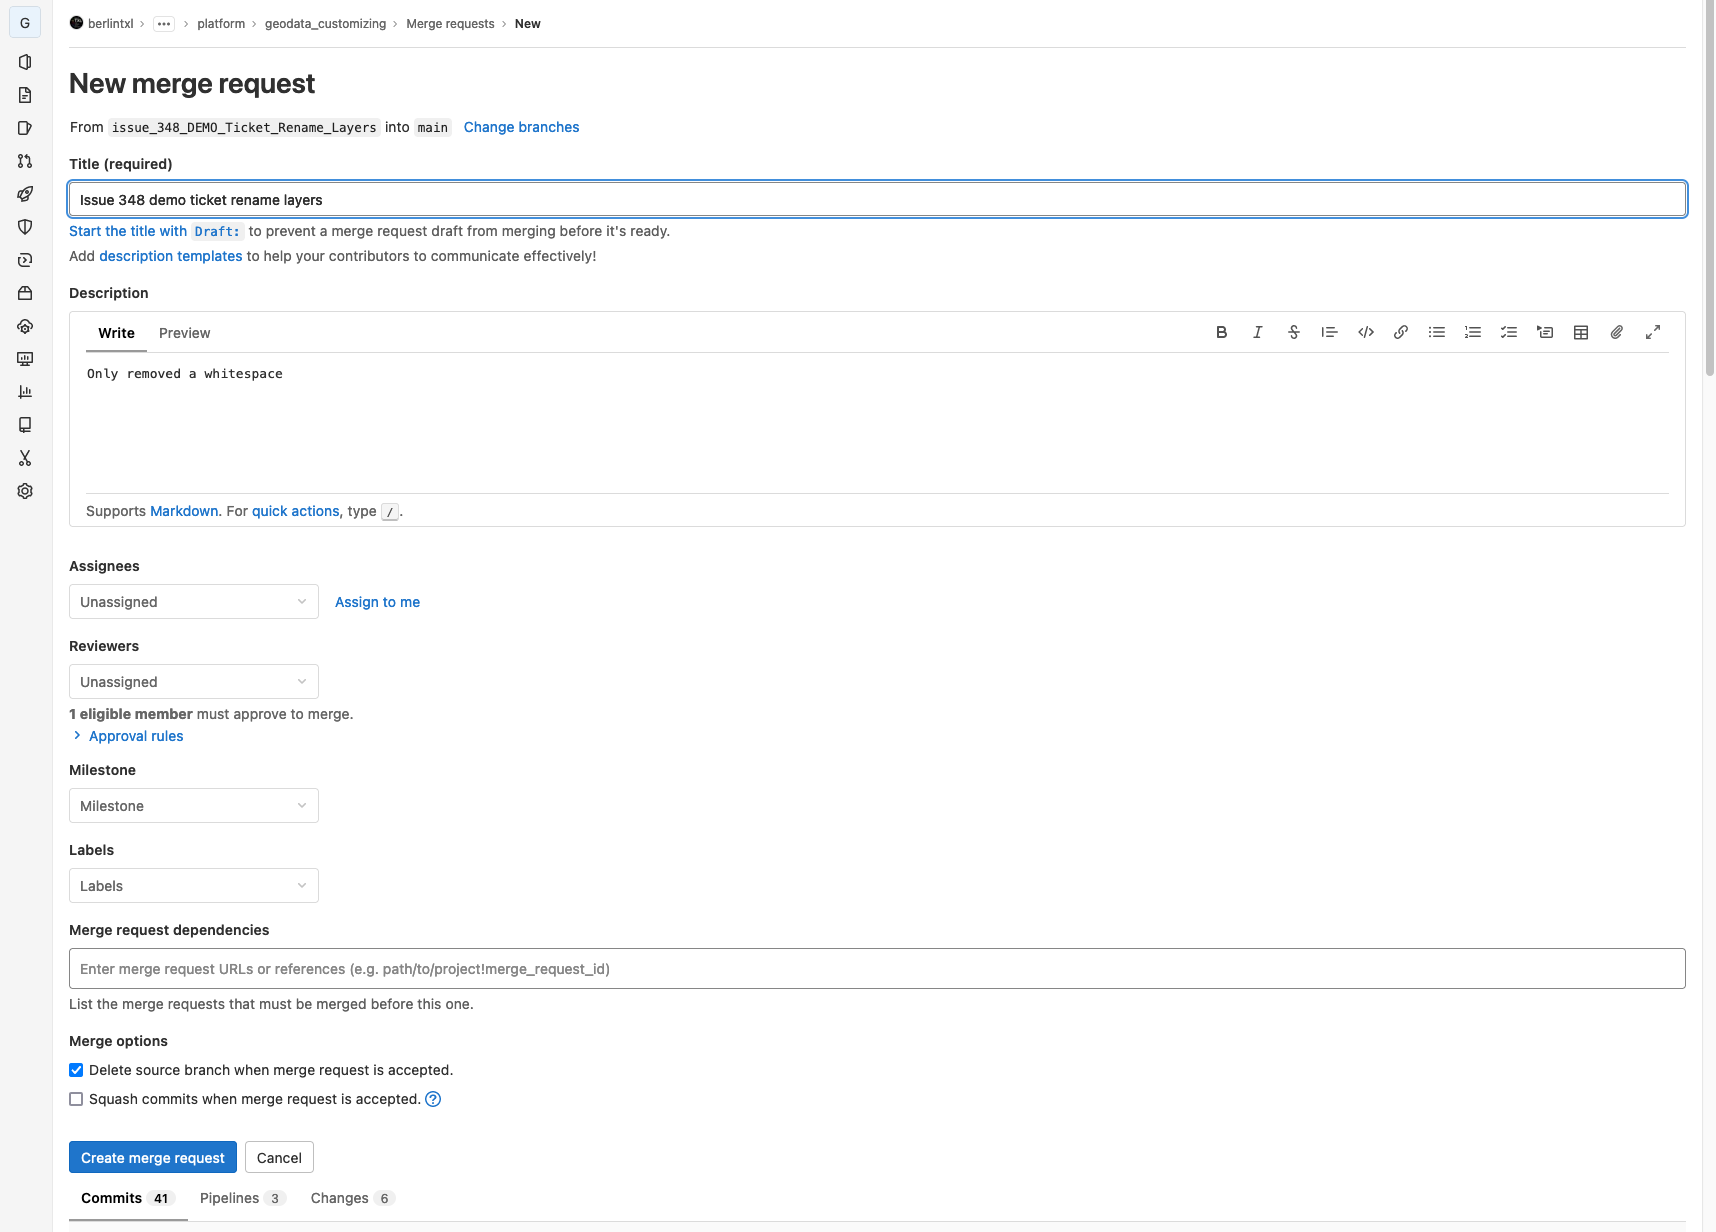
First - and most important - you have to change the target branch for the merge request. To do this, click on the Change branches link near the title.
On the following page change the target branch to "testing" and close the form with Compare branches and continue.
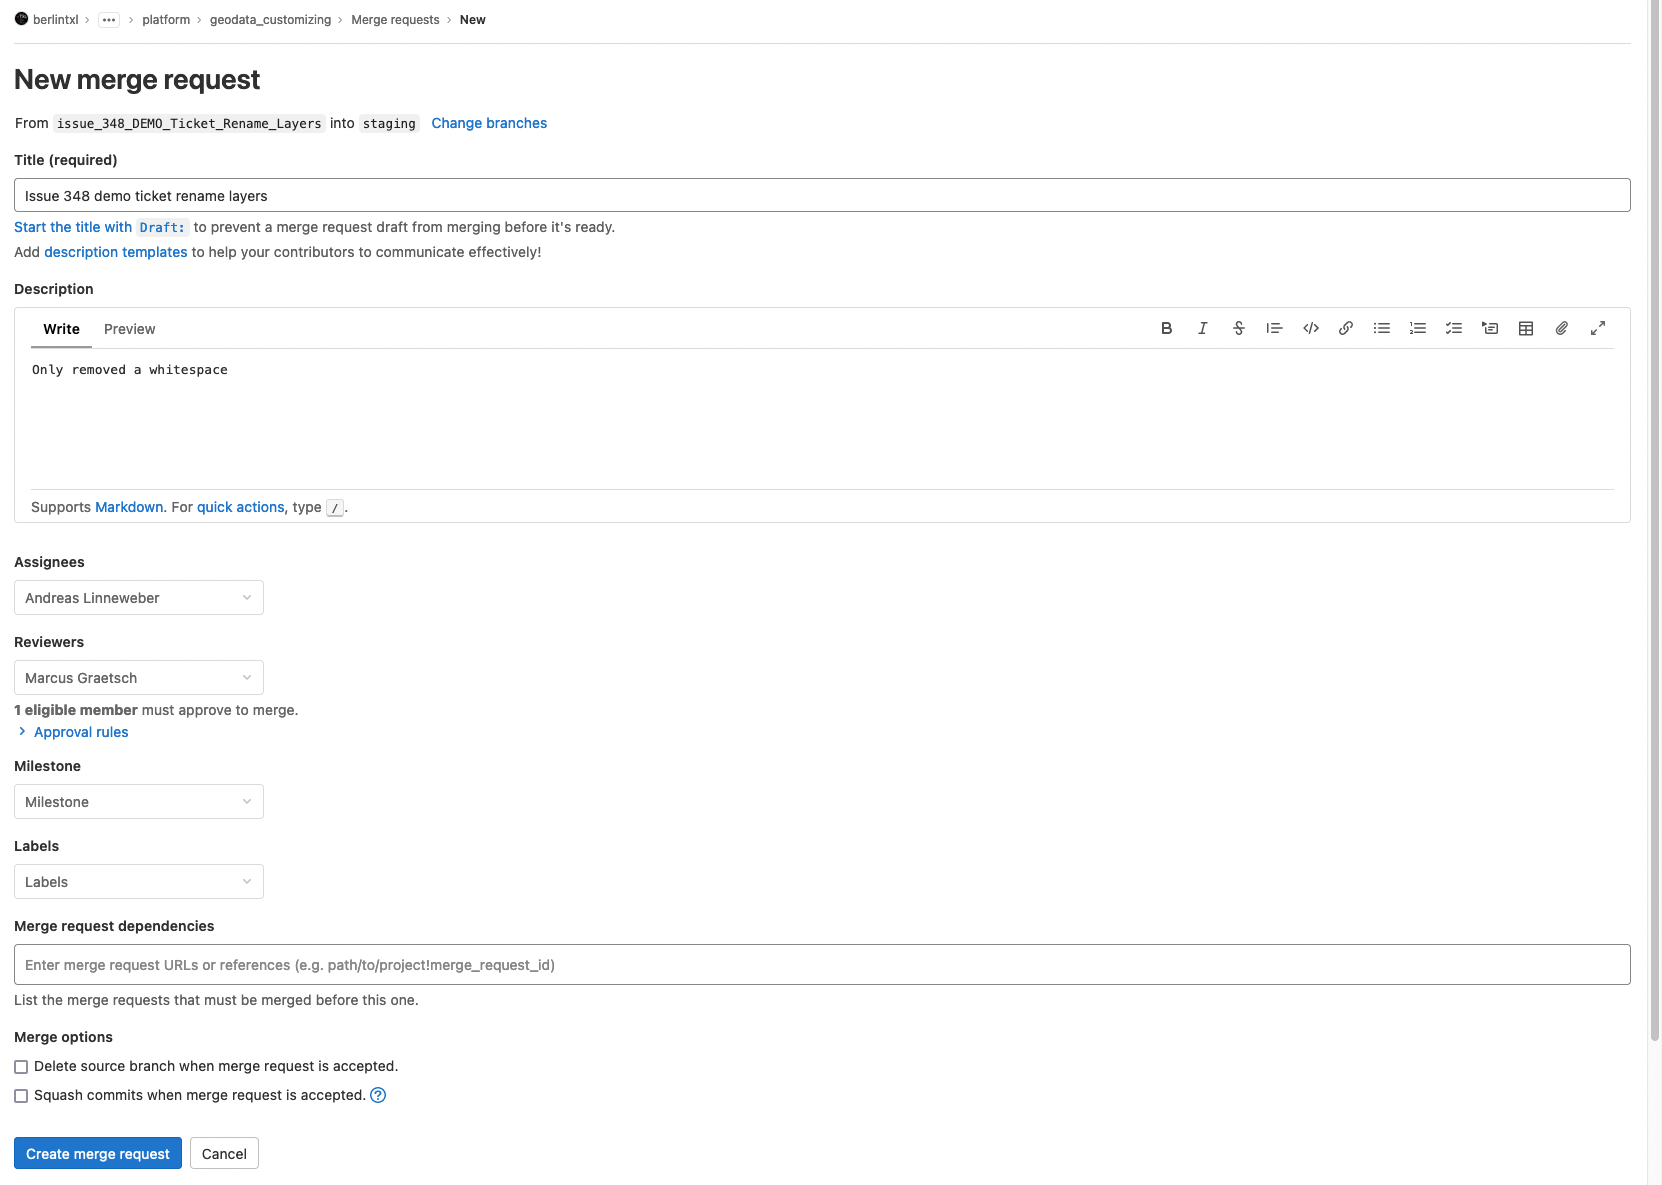
Fill in the merge request form and assign another person then yourself as reviewer. Make a decision, whether the source branch should be deleted after the merge is done - normally only chosen with the final merging.
IMPORTANT Create a short change log to describe your changes and document them, for the reviewer. This makes the process more transparent and efficient.
When you are done, click on Create merge request
The result will look like this.
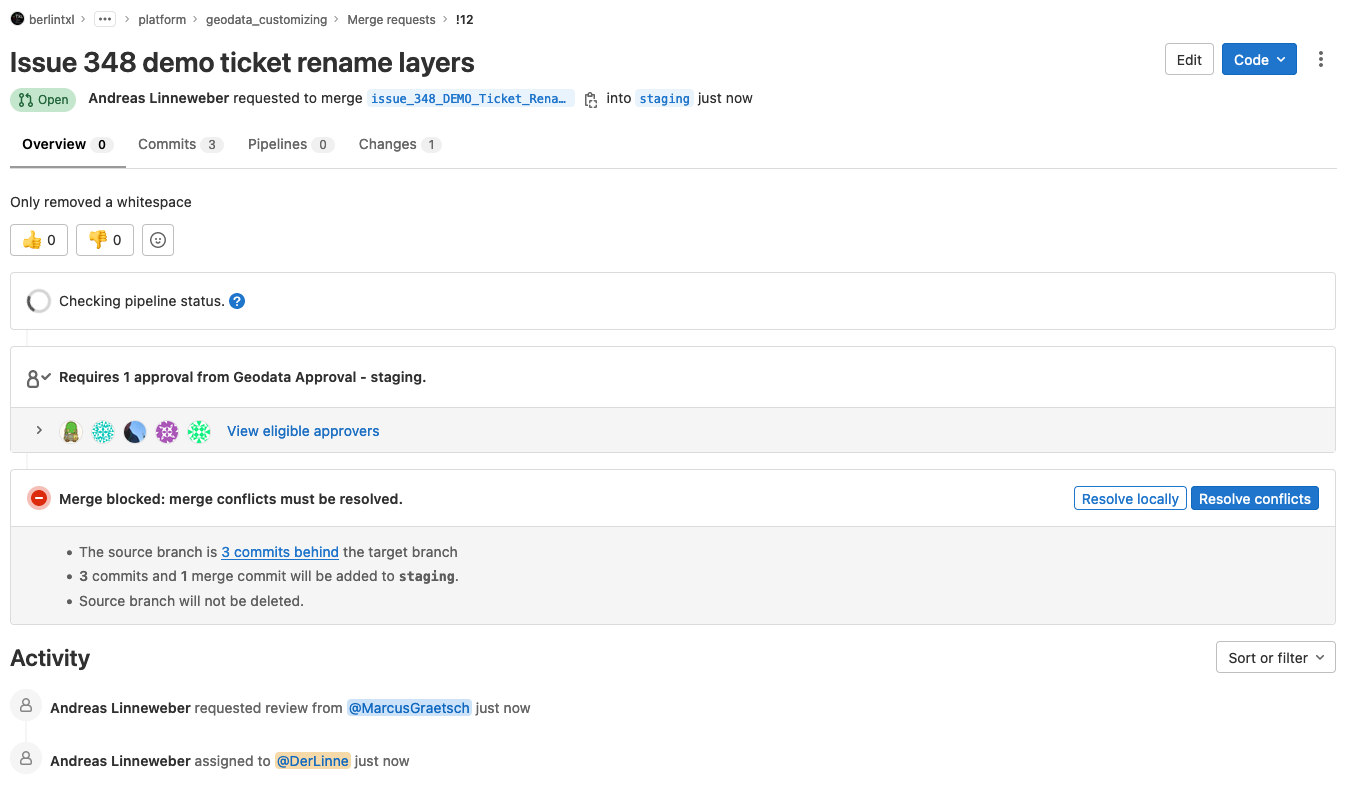
The referenced reviewer will be informed and has to approve the merge request after checking your changes.
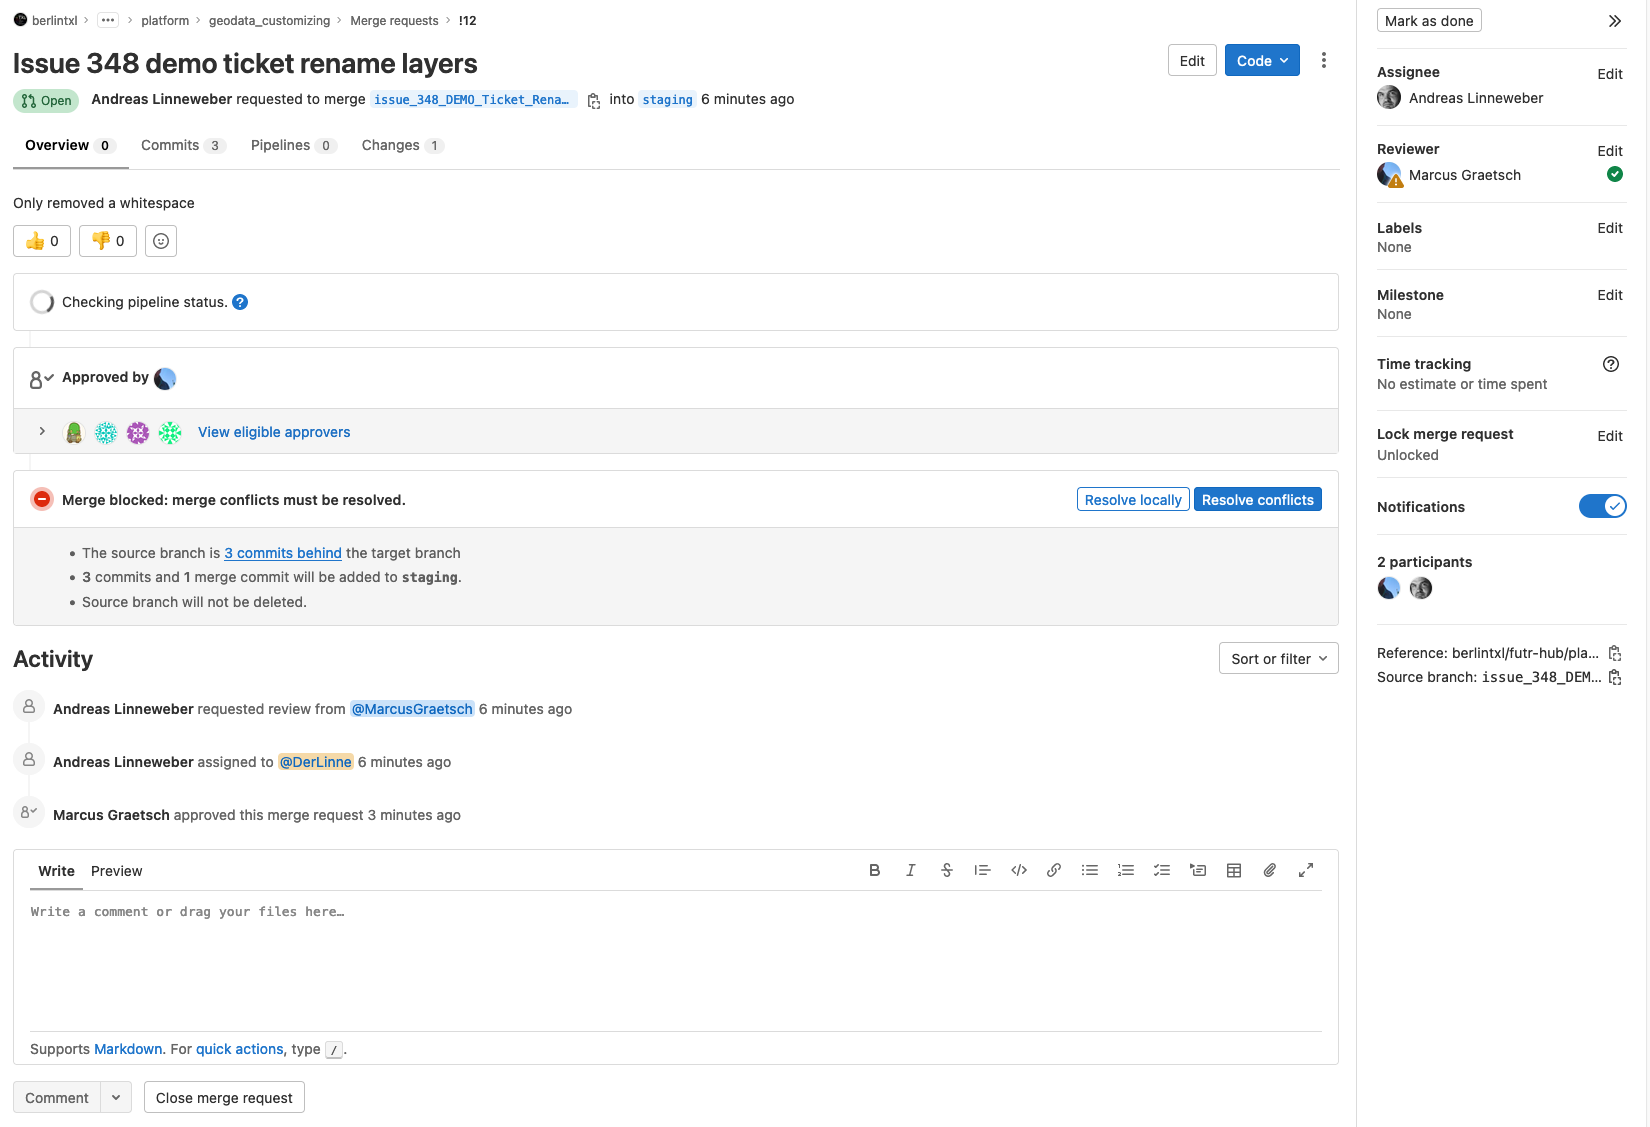
After the approval the merge request looks like this:
13. (Gitlab) Optional step: Resolve merge conflicts
In our example merge conflicts appear because parallel to the changes in our branch, the target branch was changed, too. In this case, the resolving can be done online or locally.
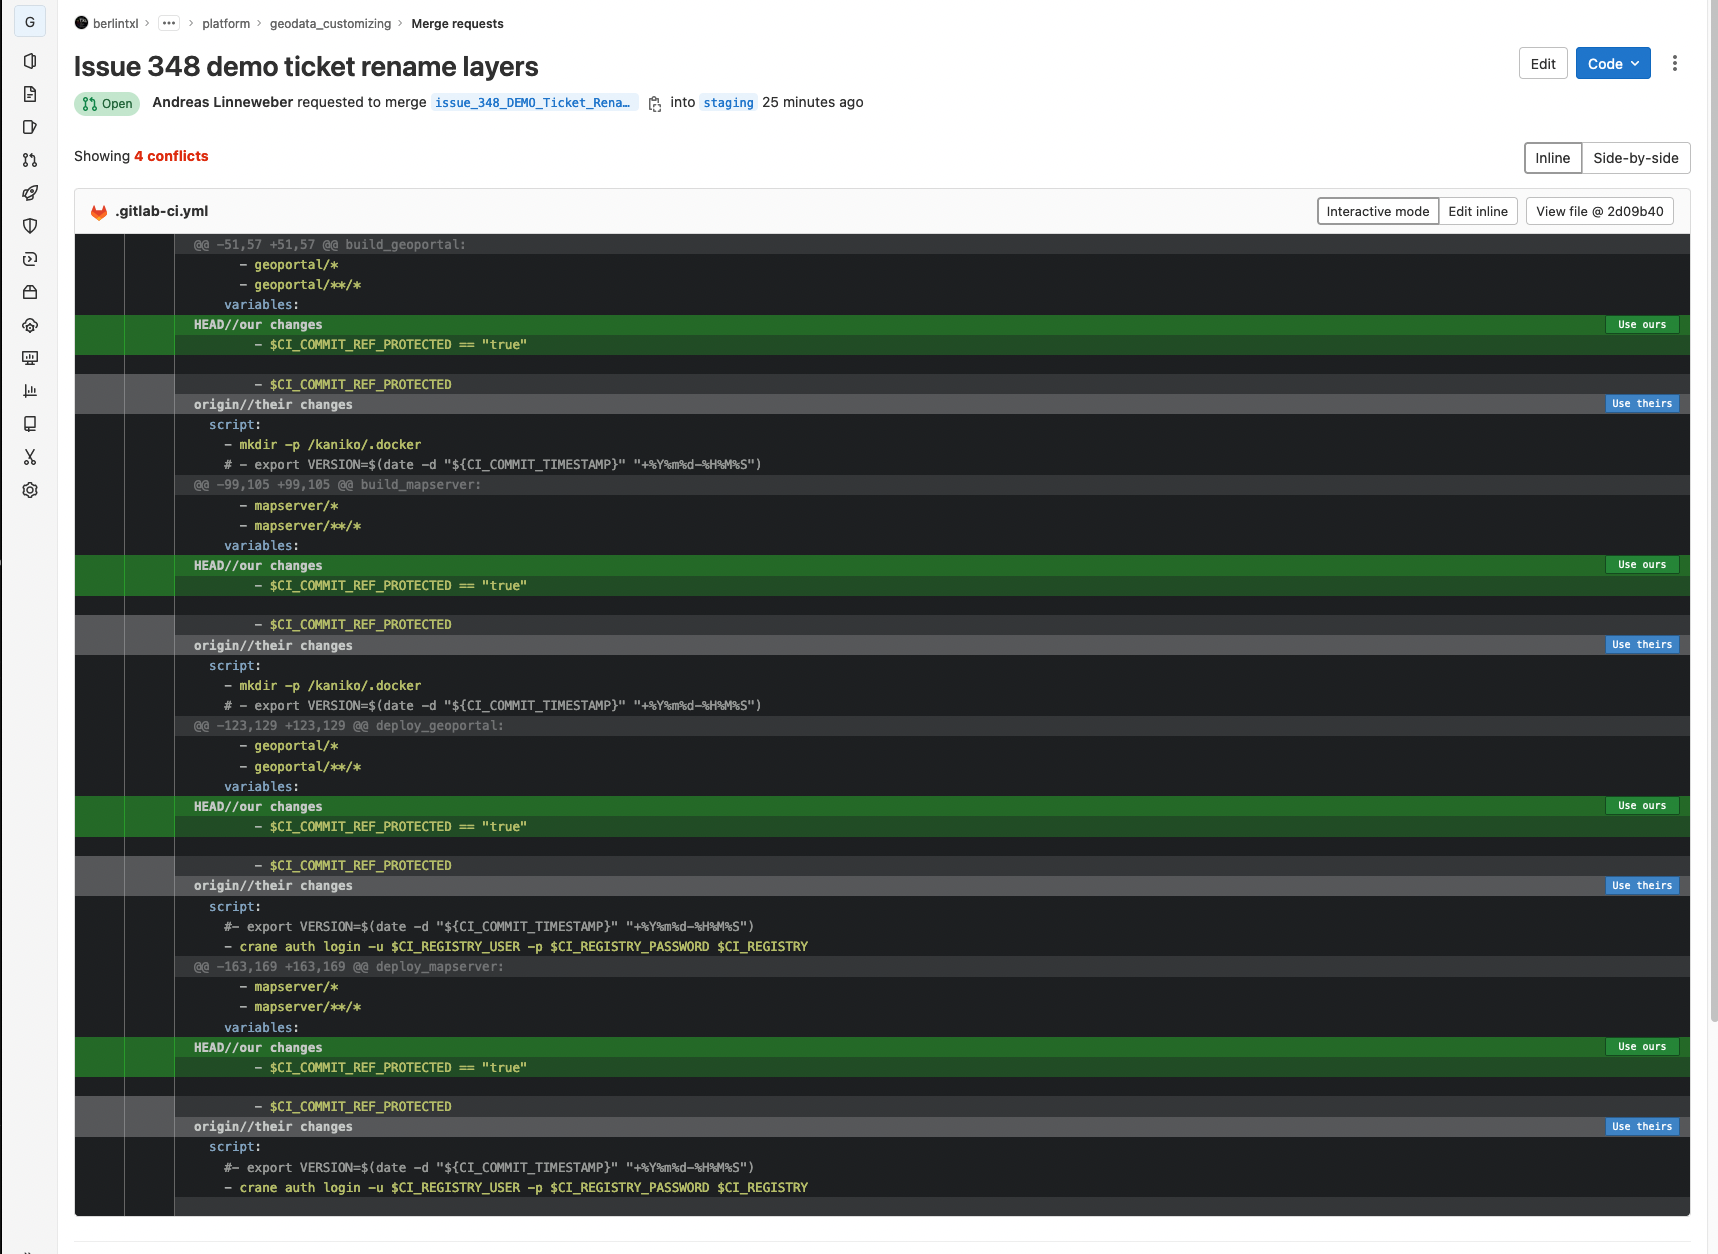
The online process looks like this:
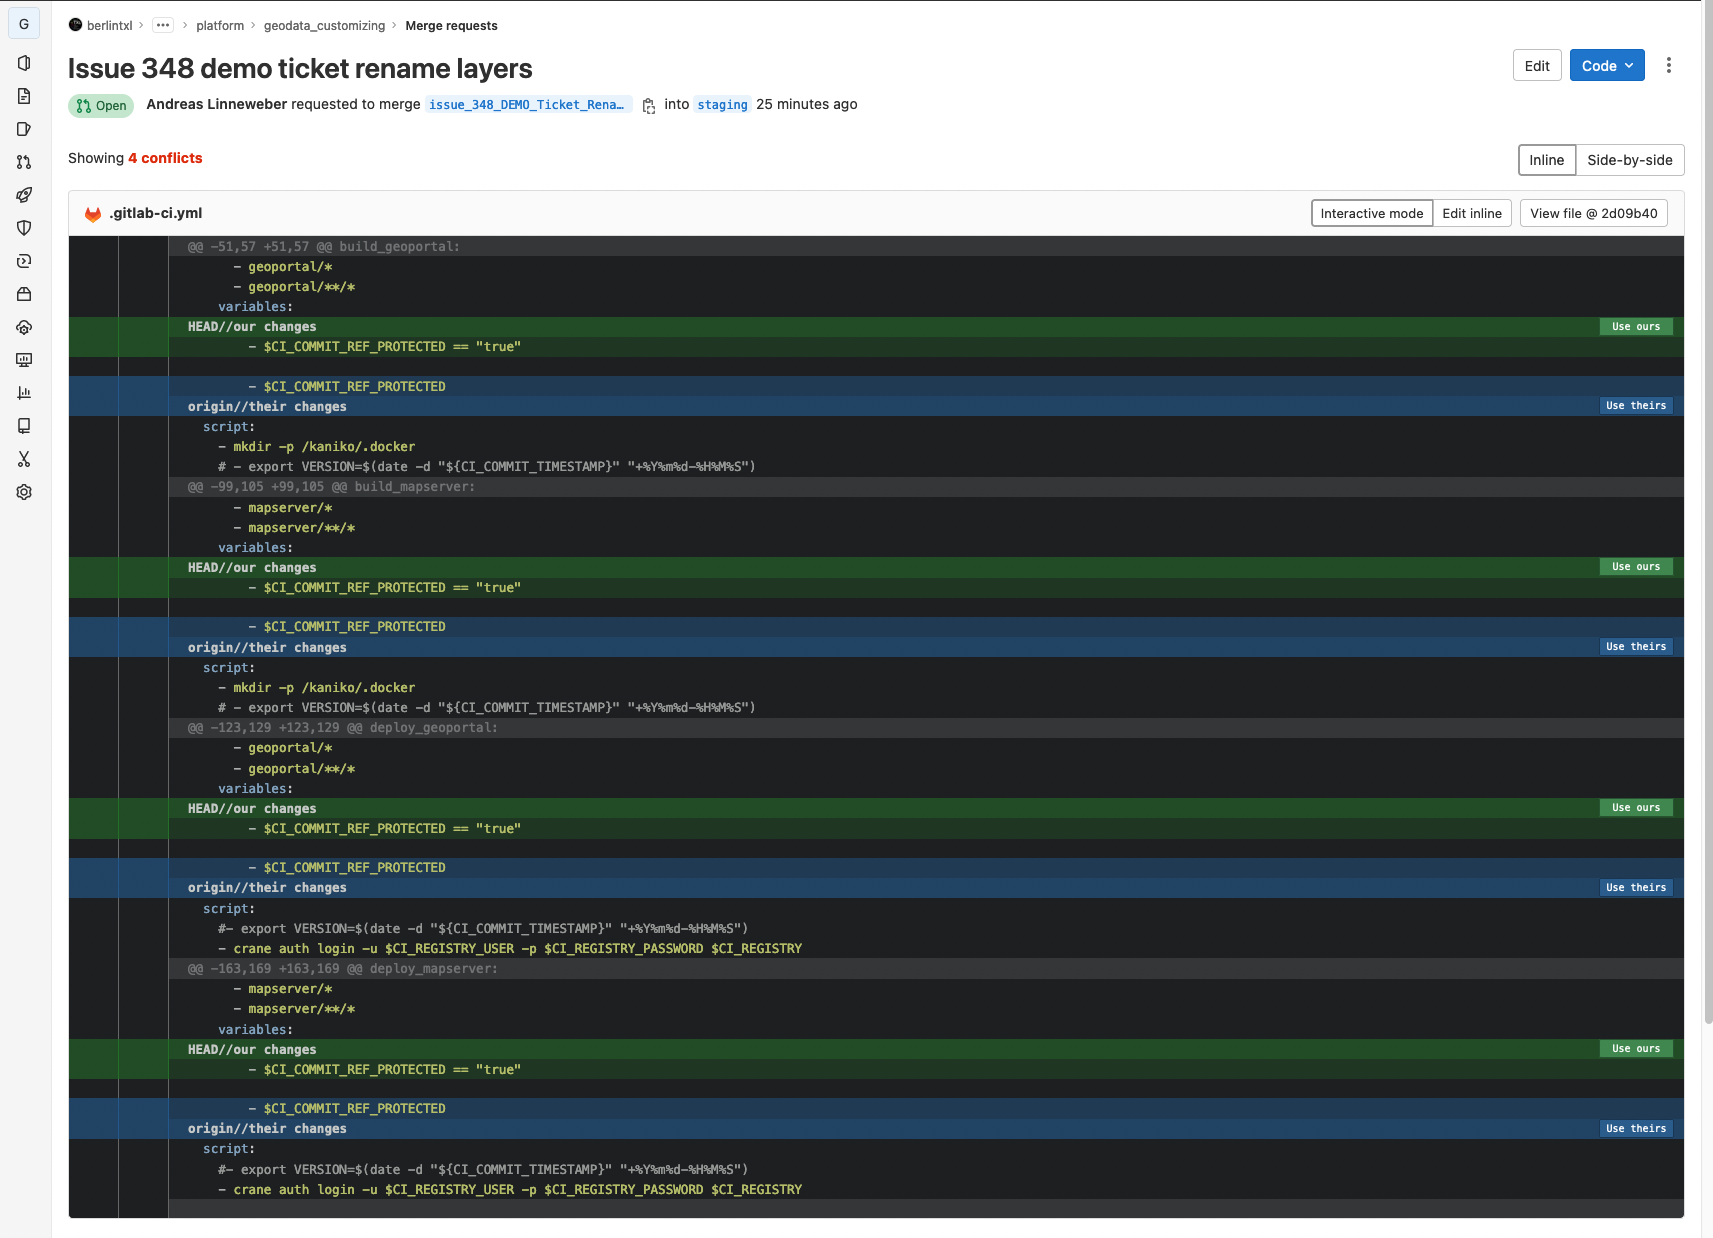
For each conflict you can decide which version should be used. Click for each one on Use ours or Use theirs. In the example case always Use ours was selected and the result looks like this:
To finalize the process, the last step is:
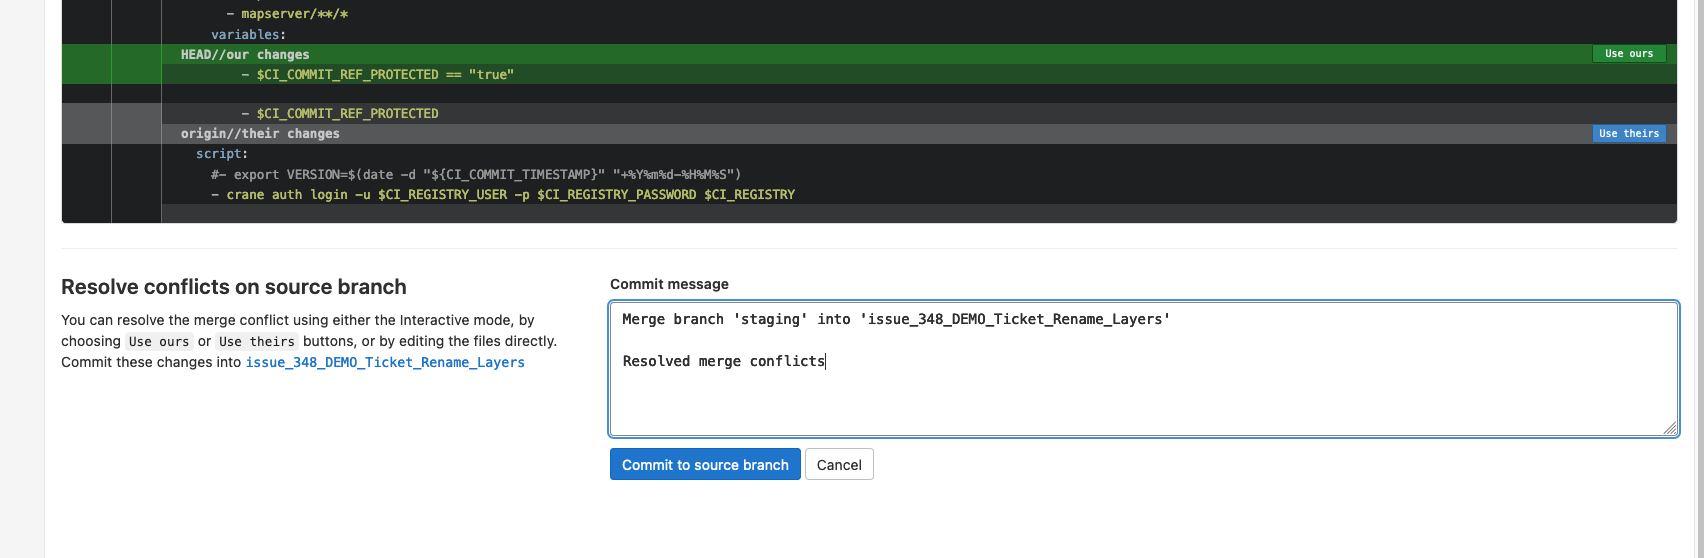
Document the merge changes by adding a commit message and click on Commit to source branch
Gitlab will send you back to the merge request and then you can click Merge
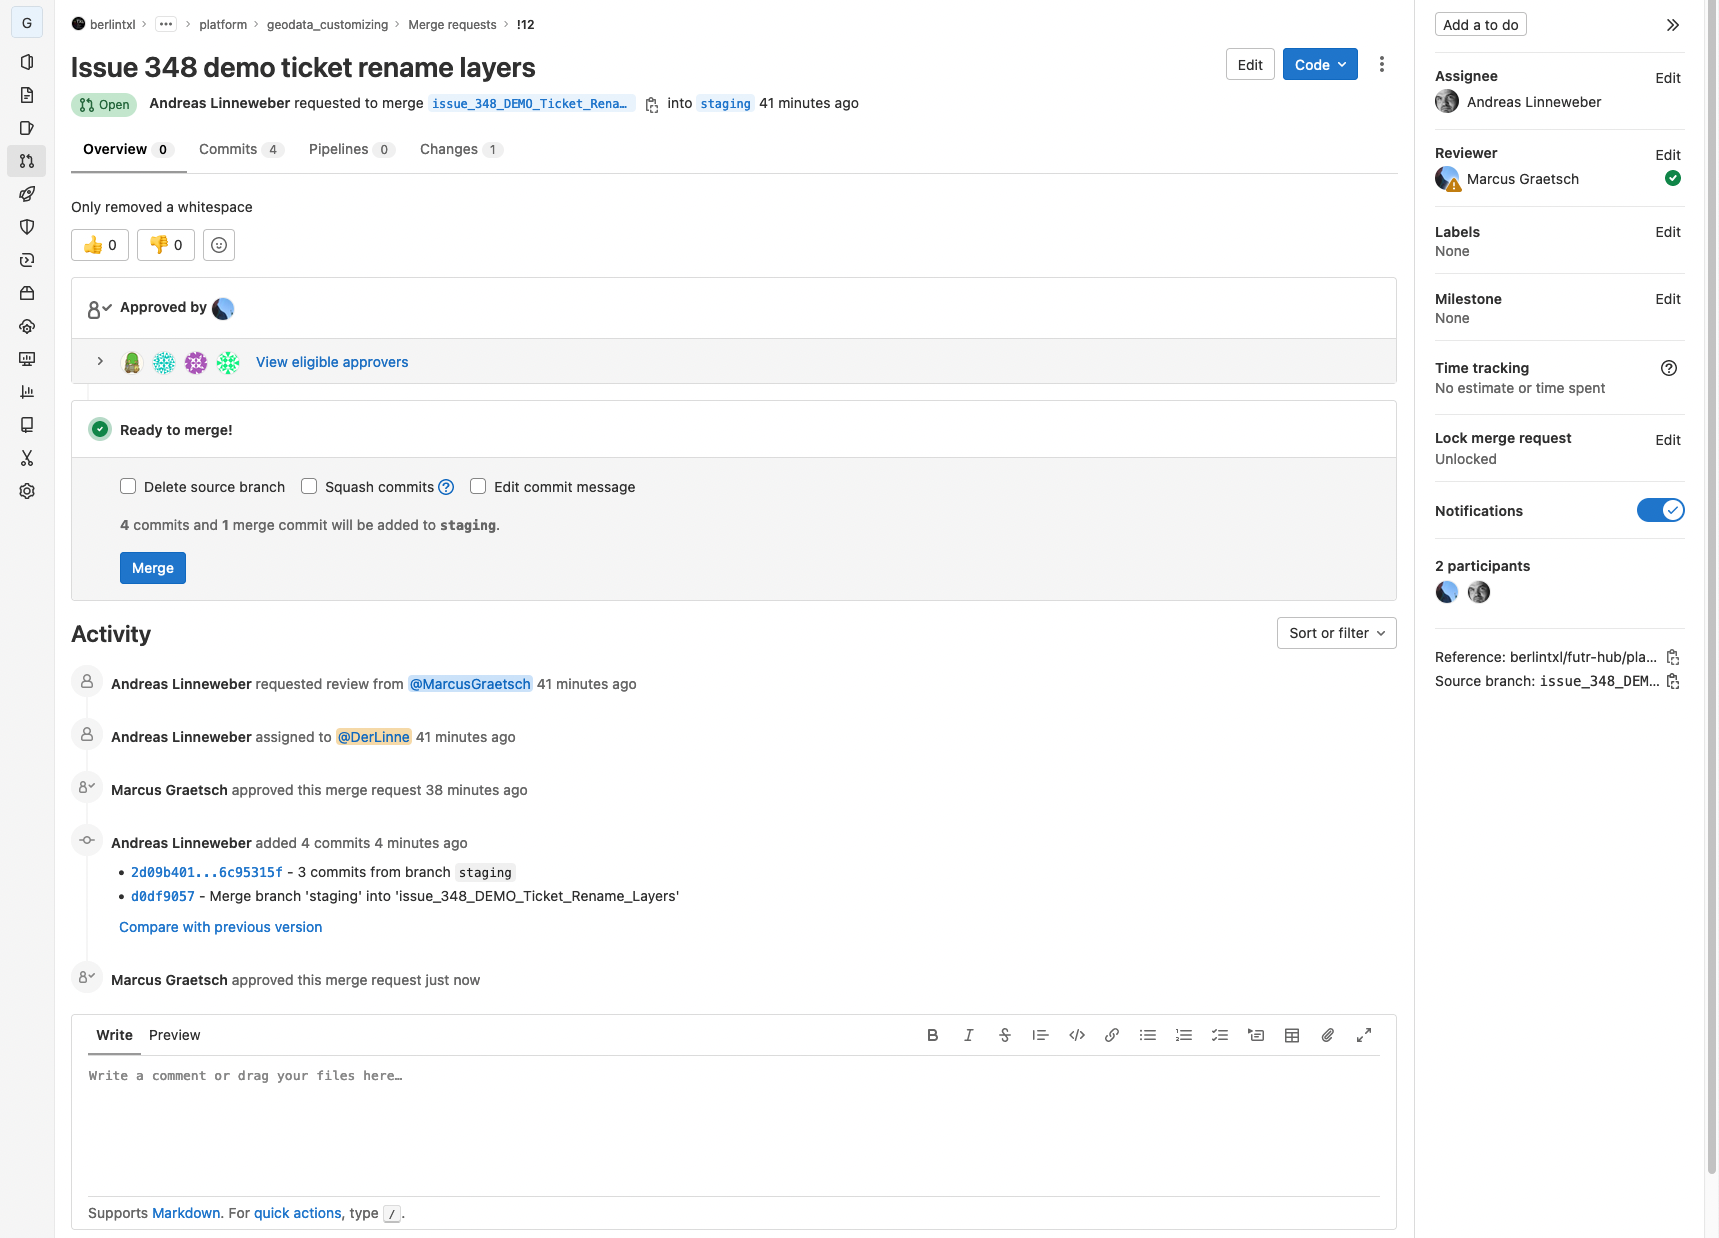
After starting the merge, the result looks like this:

To resolve merge conflicts locally in Visual Studio Code use:
git checkout name_of_source_branch
git pull
git checkout name_of_target_branch
git pull
git merge name_of_source_branch
Resolve the conflicts in VSC and push the result:
git commit -a -m "Fix Merge Conflicts"
git push
14. (Gitlab) Build containers and deploy to testing
Unchanged to current process
15. (testing Stage) Test changes in testing environment
Unchanged to current process
16. (Gitlab) Create merge request for prod stage**
Here the step from above is run again - with only one difference:
Source Branch is testing
Target Branch is production
17. (Gitlab) Build containers and deploy to prod**
Unchanged to current process
Content dependent Building
The CI/CD pipeline builds up to four images for the deployment. That is because each customization in the process is deployed as a new software artefact.
The four possible images are:
- The Masterportal image
- The QGIS Server image
- The Portal Backend image
- The Mapfish Image
The CI/CD uses the detection of changes in the repository to decide, if a new image is needed.
- If changes in the folder
geoportalare detected, the Masterportal image is created. - If changes in the folder
mapserverare detected, the QGIS Server image is created. - If changes in the folders
portal-backendorportal-configare detected, the Backend Image is created. - If changes in the folders
mapfish_printare detected, the Mapfish Image is created.
Additional Tips & Tricks
Deleting a branch
When the development/change is finally done and published to Prod (merged with the production branch) the working branch should be deleted.
This can be done be opening the branch UI again: Link: Geodata Customizing - Branches
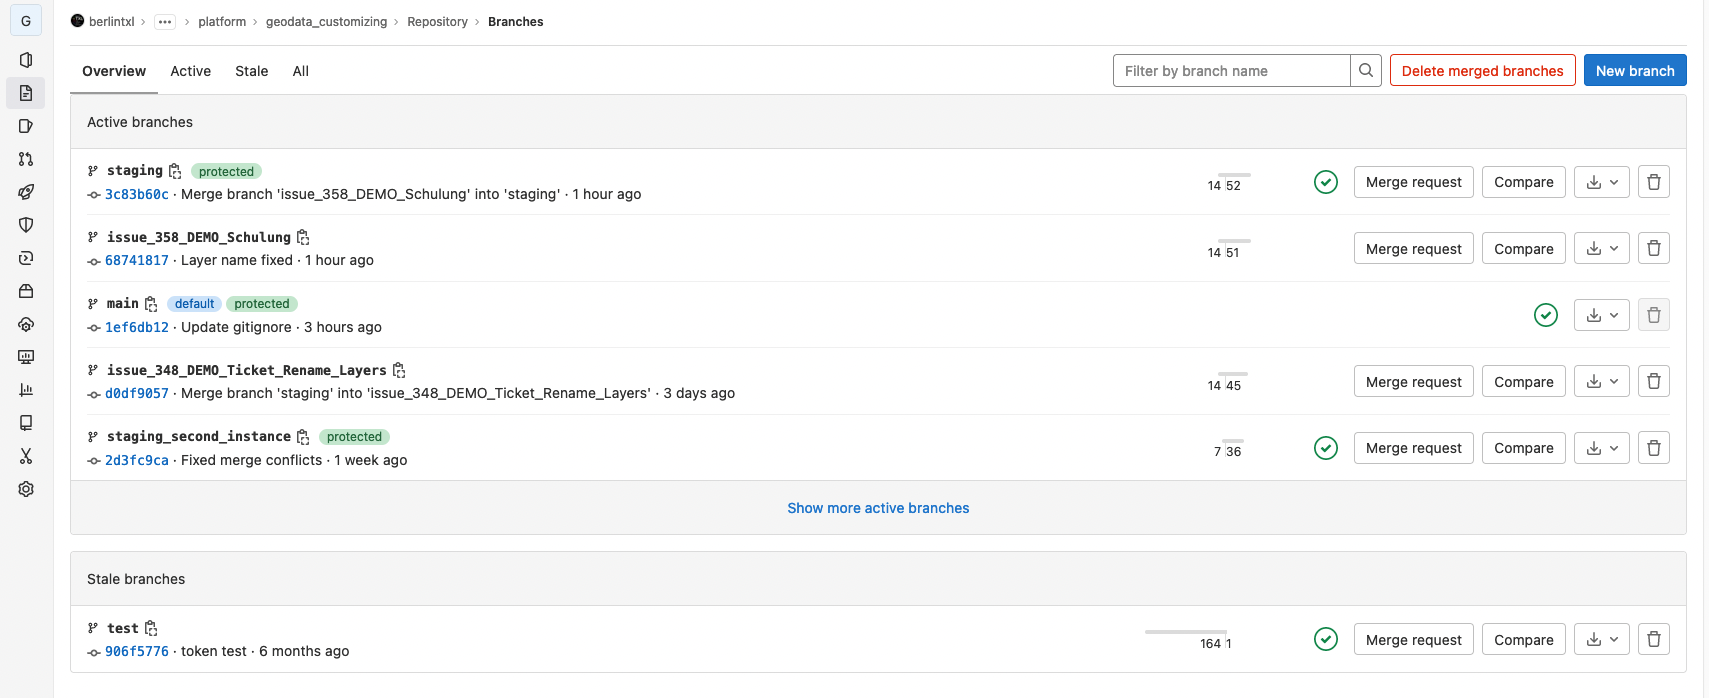
Deleting can be started by a click on the Trashbin Symbol on the right side for the corresponding branch.
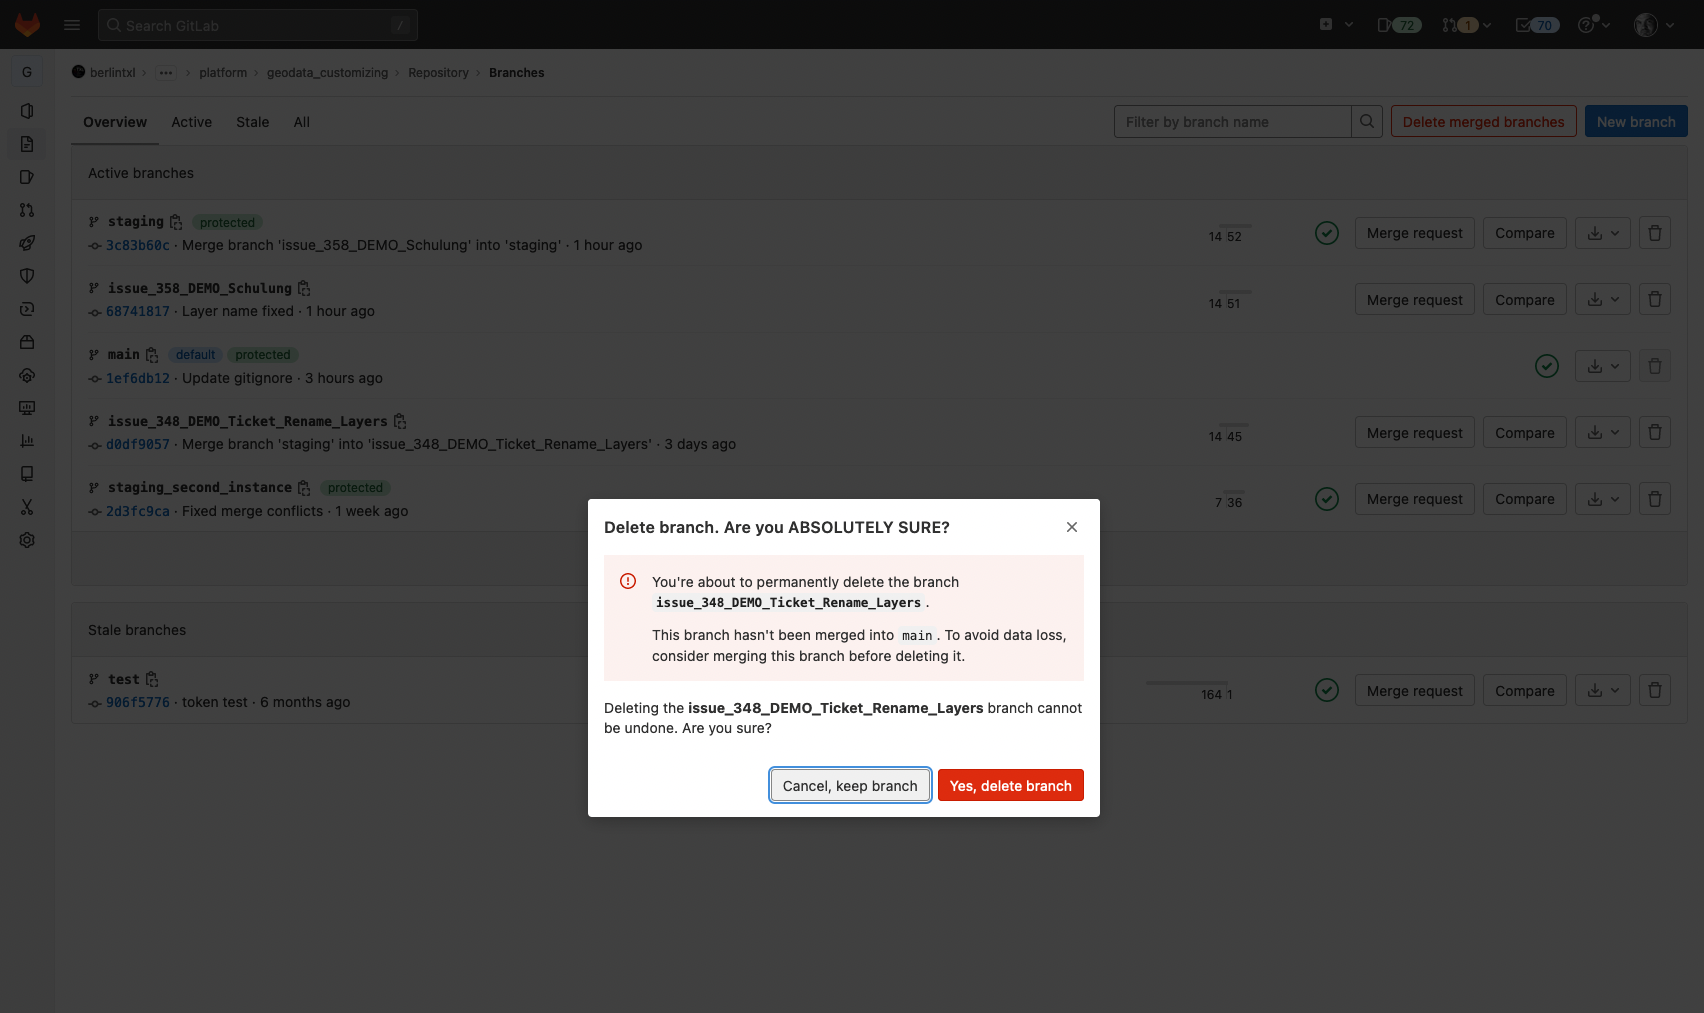
You are informed, that this cannot be undone. Confirm with a click on "Yes, delete branch"
Checklist for merge request execution
- [ ] (Creator) Check if all needed files are part of the git tracking - untracked files have a "U" beside it in the file explorer of VSCode - to add use
git add filenameorgit add * - [ ] (Creator) Test your changes with docker-componse in local dev_environment
- [ ] (Creator) Start merge request
- [ ] (Reviewer) Test your changes with docker-componse in local dev_environment
- [ ] (Reviewer) Approve merge request
- [ ] (Creator) Test changes on target stage