Styling with GeoStyler
Introduction
On the geoserver you can create styles for layers with the geostyler plugin. An online demo of that plugin can be found here https://geostyler.github.io/geostyler-demo/
First Install the Geostyler plugin on the geoserver.
Make yourself familiar with the syntax, structure and tags of the SLD Style XML files of the geoserver: https://docs.geoserver.org/stable/en/user/styling/sld/index.html
SLD stands for Styled Layer Descriptor it is an encoding to extend the WMS standard to allow user-defined symbolization and coloring of geographic feature and coverage data. See for more here: https://www.ogc.org/standards/sld
Import SLD File in Geoserver
This steps takes as an example that you in QGIS first export a style of a layer as an SLD file.
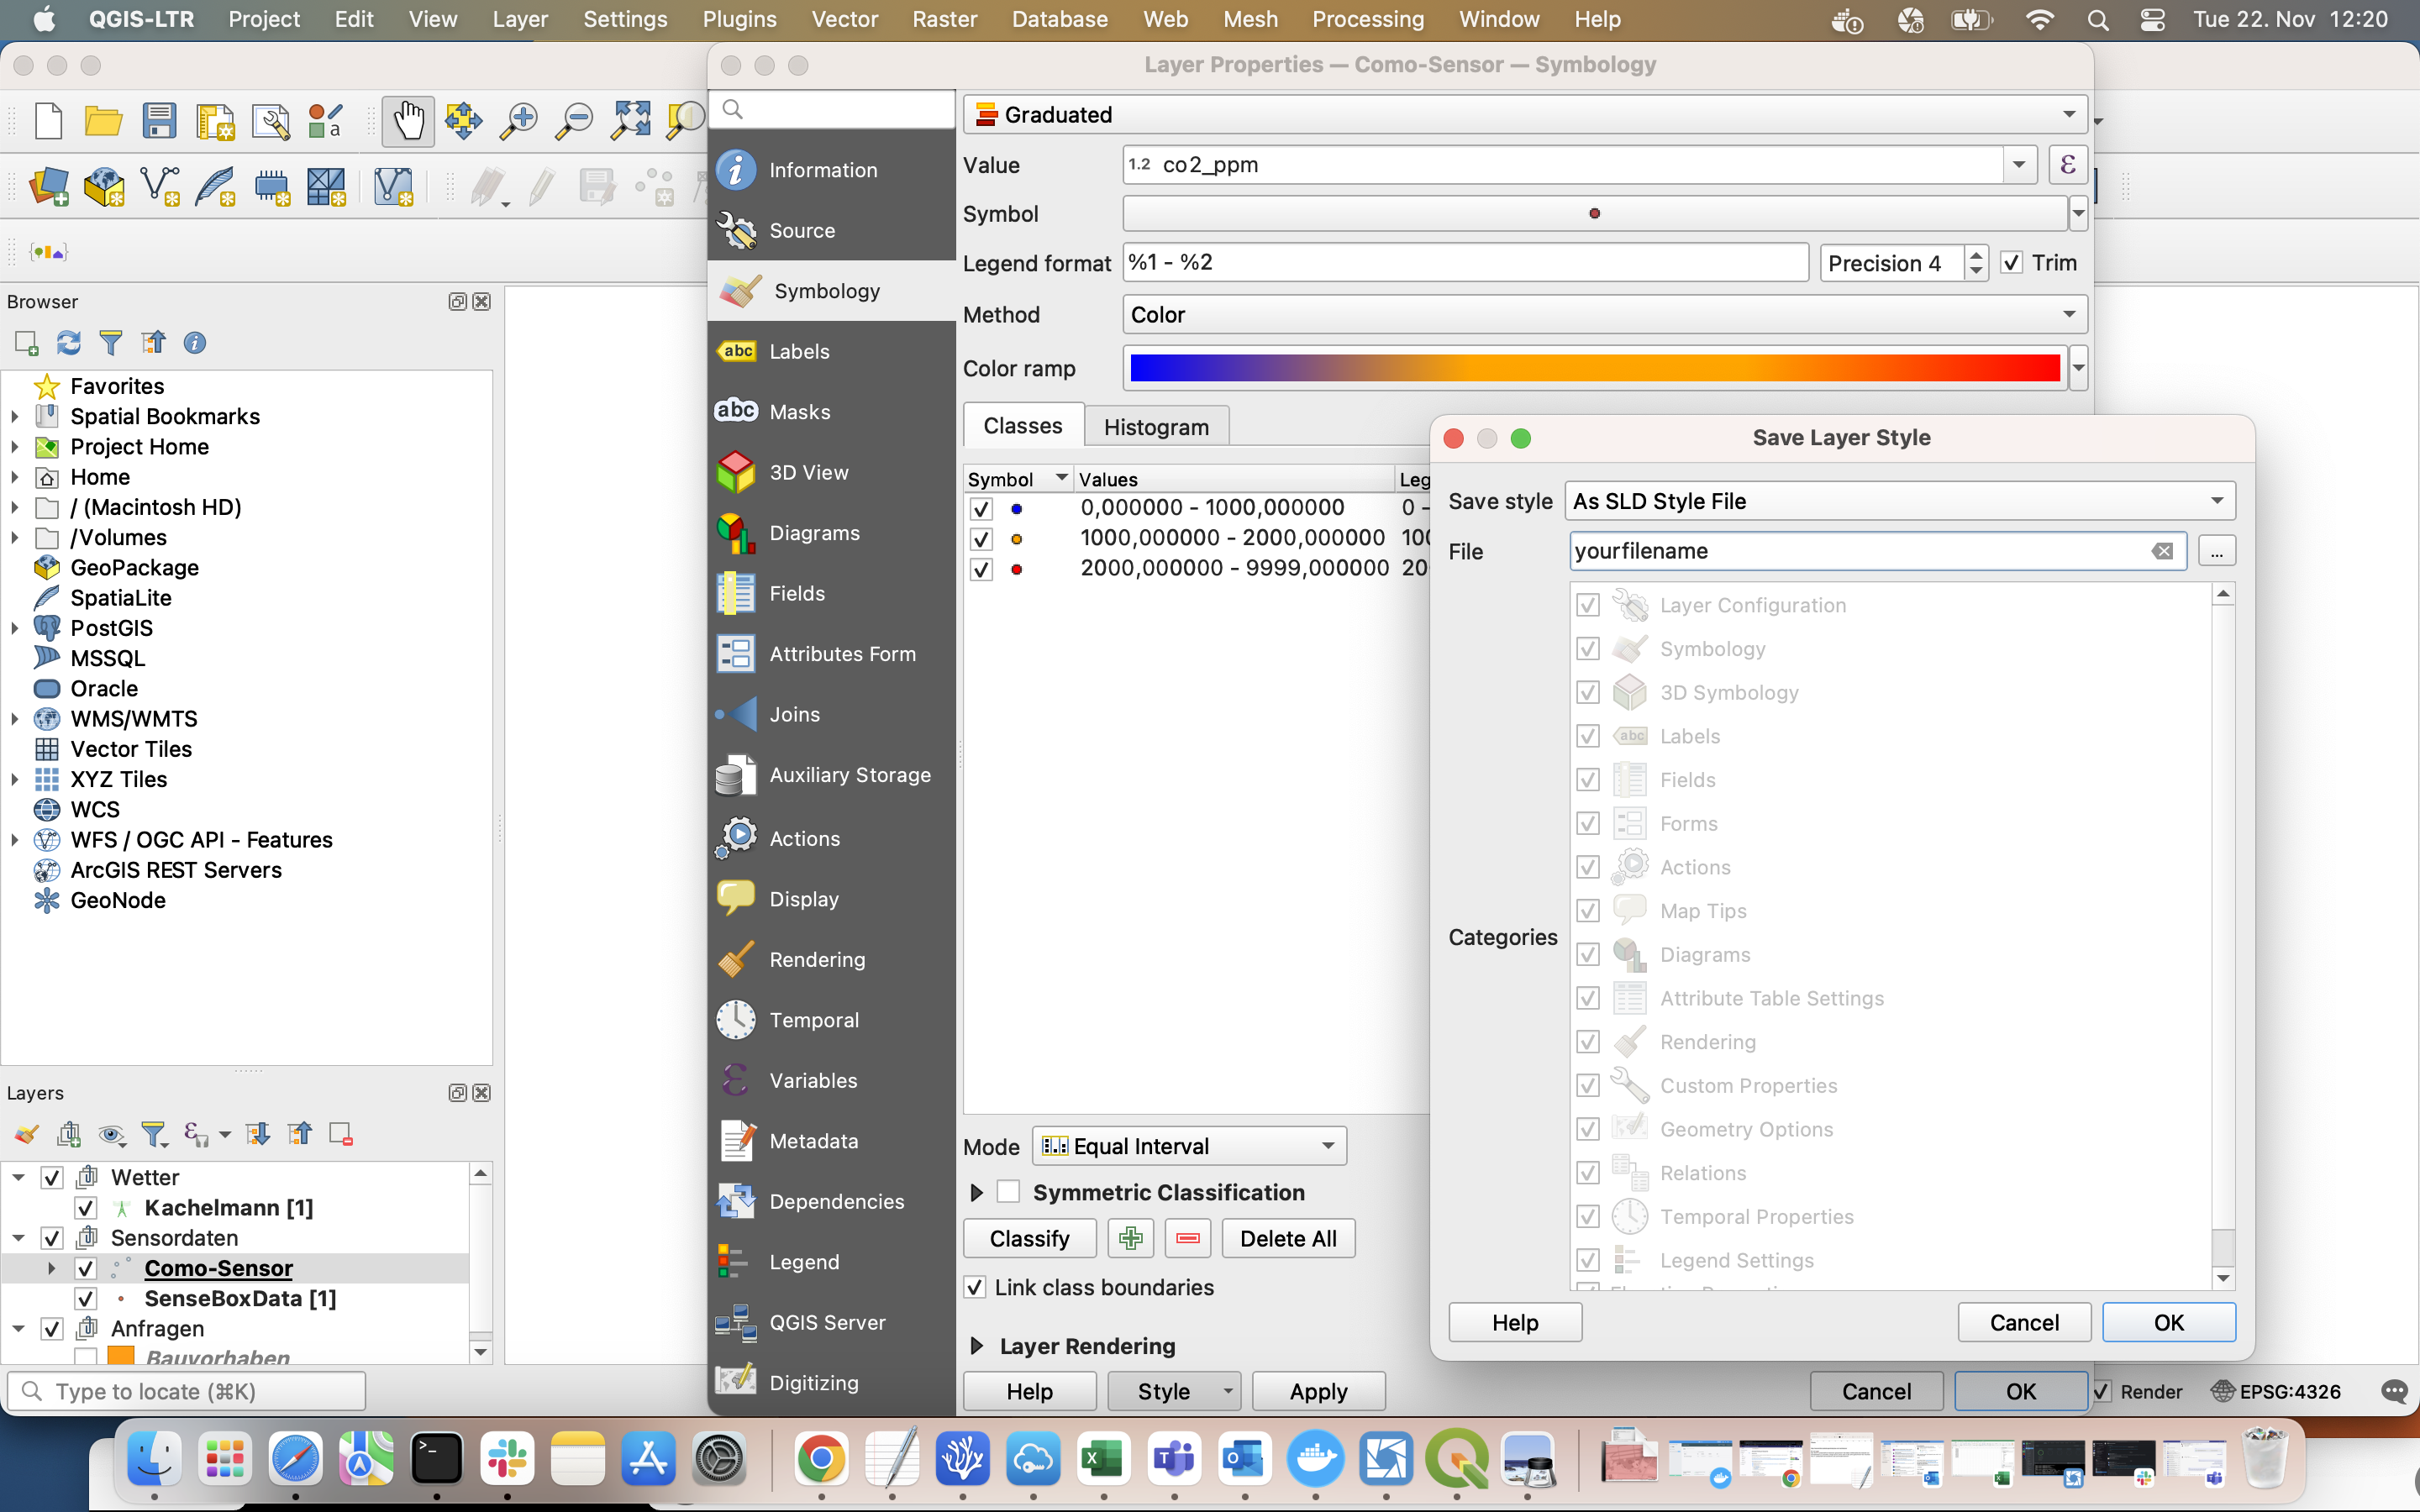
Export Style in QGIS:
In QGIS rigth click on your layer and select "Prooerties", from the next window click on "Symbology", there choose "Style" on the bottom of the window. Clcik on "Save style", in the next window set in "Save Style" on "AS SLD Style File", type the name of the file. and click "OK".
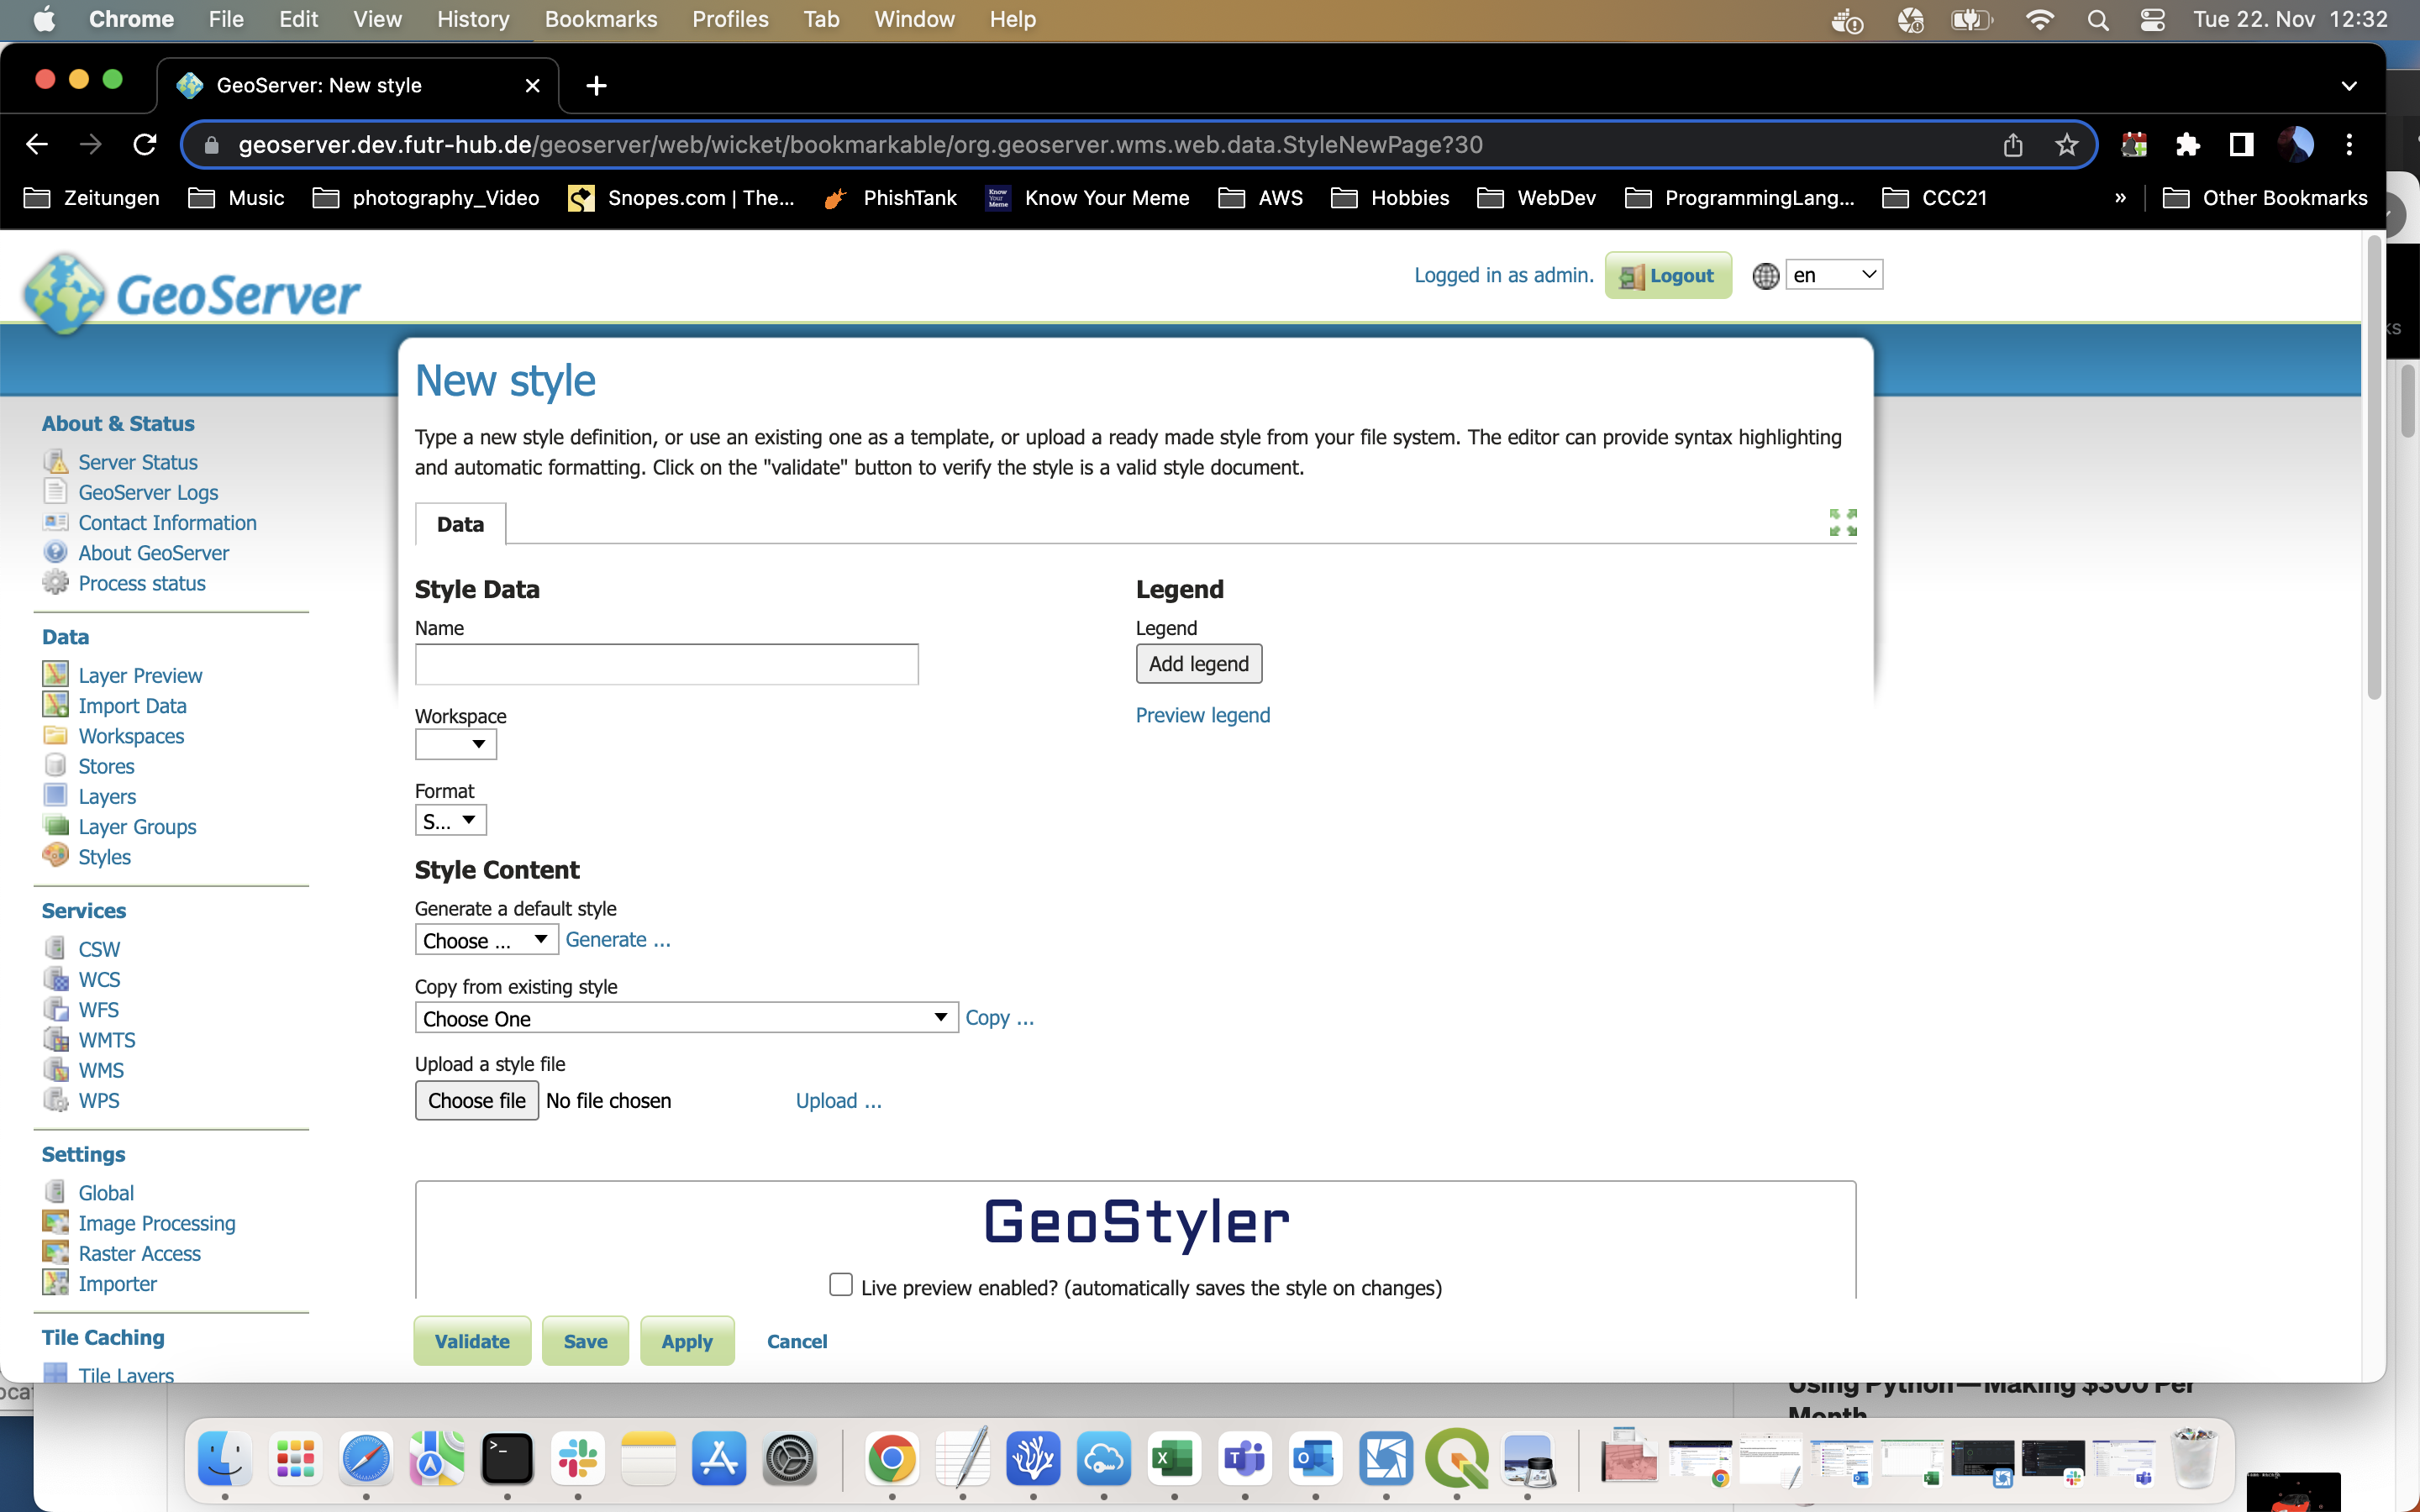
Import Style in Geoserver Geostyler
Click on Styles in the right menu (under Data). On next page click on "Add a new style" On next page under "Upload a style file" click on "Choose file", choose your SLD file from your local drive, it is probably the one you just saved fromt QGIS.
Make changes on the Style
For this documentation I want to show you how to add an image as a marker/icon for a point on a map. Above that image I want to display the value of a specific data entry as a number/text.
From this example XML https://docs.geoserver.org/stable/en/user/styling/sld/introduction.html I want to replace the PointSymbolizer with a Textsymbolizer element:
Description of TextSymbolizer https://docs.geoserver.org/latest/en/user/styling/sld/reference/textsymbolizer.html
example xml code here:
          <Label>
            <ogc:PropertyName>co2_ppm</ogc:PropertyName>
          </Label>
          <Font>
            <CssParameter name="font-family">Arial</CssParameter>
            <CssParameter name="font-size">48</CssParameter>
            <CssParameter name="font-style">normal</CssParameter>
            <CssParameter name="font-weight">bold</CssParameter>
          </Font>
          <LabelPlacement>
            <PointPlacement>
              <AnchorPoint>
                <AnchorPointX>0.0</AnchorPointX>
                <AnchorPointY>0.0</AnchorPointY>
              </AnchorPoint>
              <Displacement>
                <DisplacementX>0</DisplacementX>
                <DisplacementY>0</DisplacementY>
              </Displacement>
            </PointPlacement>
          </LabelPlacement>
          <Fill>
            <CssParameter name="fill">#0000FF</CssParameter>
          </Fill>
            <Graphic>
              <ExternalGraphic xmlns="http://www.opengis.net/sld" xmlns:xlink="http://www.w3.org/1999/xlink">
                <OnlineResource xlink:type="simple" xlink:href="ComoSensorMarker-blue.png" />
                <Format>image/png</Format>
              </ExternalGraphic>
			</Graphic>
        </TextSymbolizer>
The Label and <ogc:PropertyName> tags refer to the a value (co2_ppm) within that layer. For further description of labeling see here: https://docs.geoserver.org/latest/en/user/styling/sld/reference/labeling.html
To add an image first set the cursor in the code where you want to add the xml snippet for the image.
Then click on this icon in GeoStyler menu, above the text field:

A new window opens up and you can either select an already uploaded image or you upload a new image.
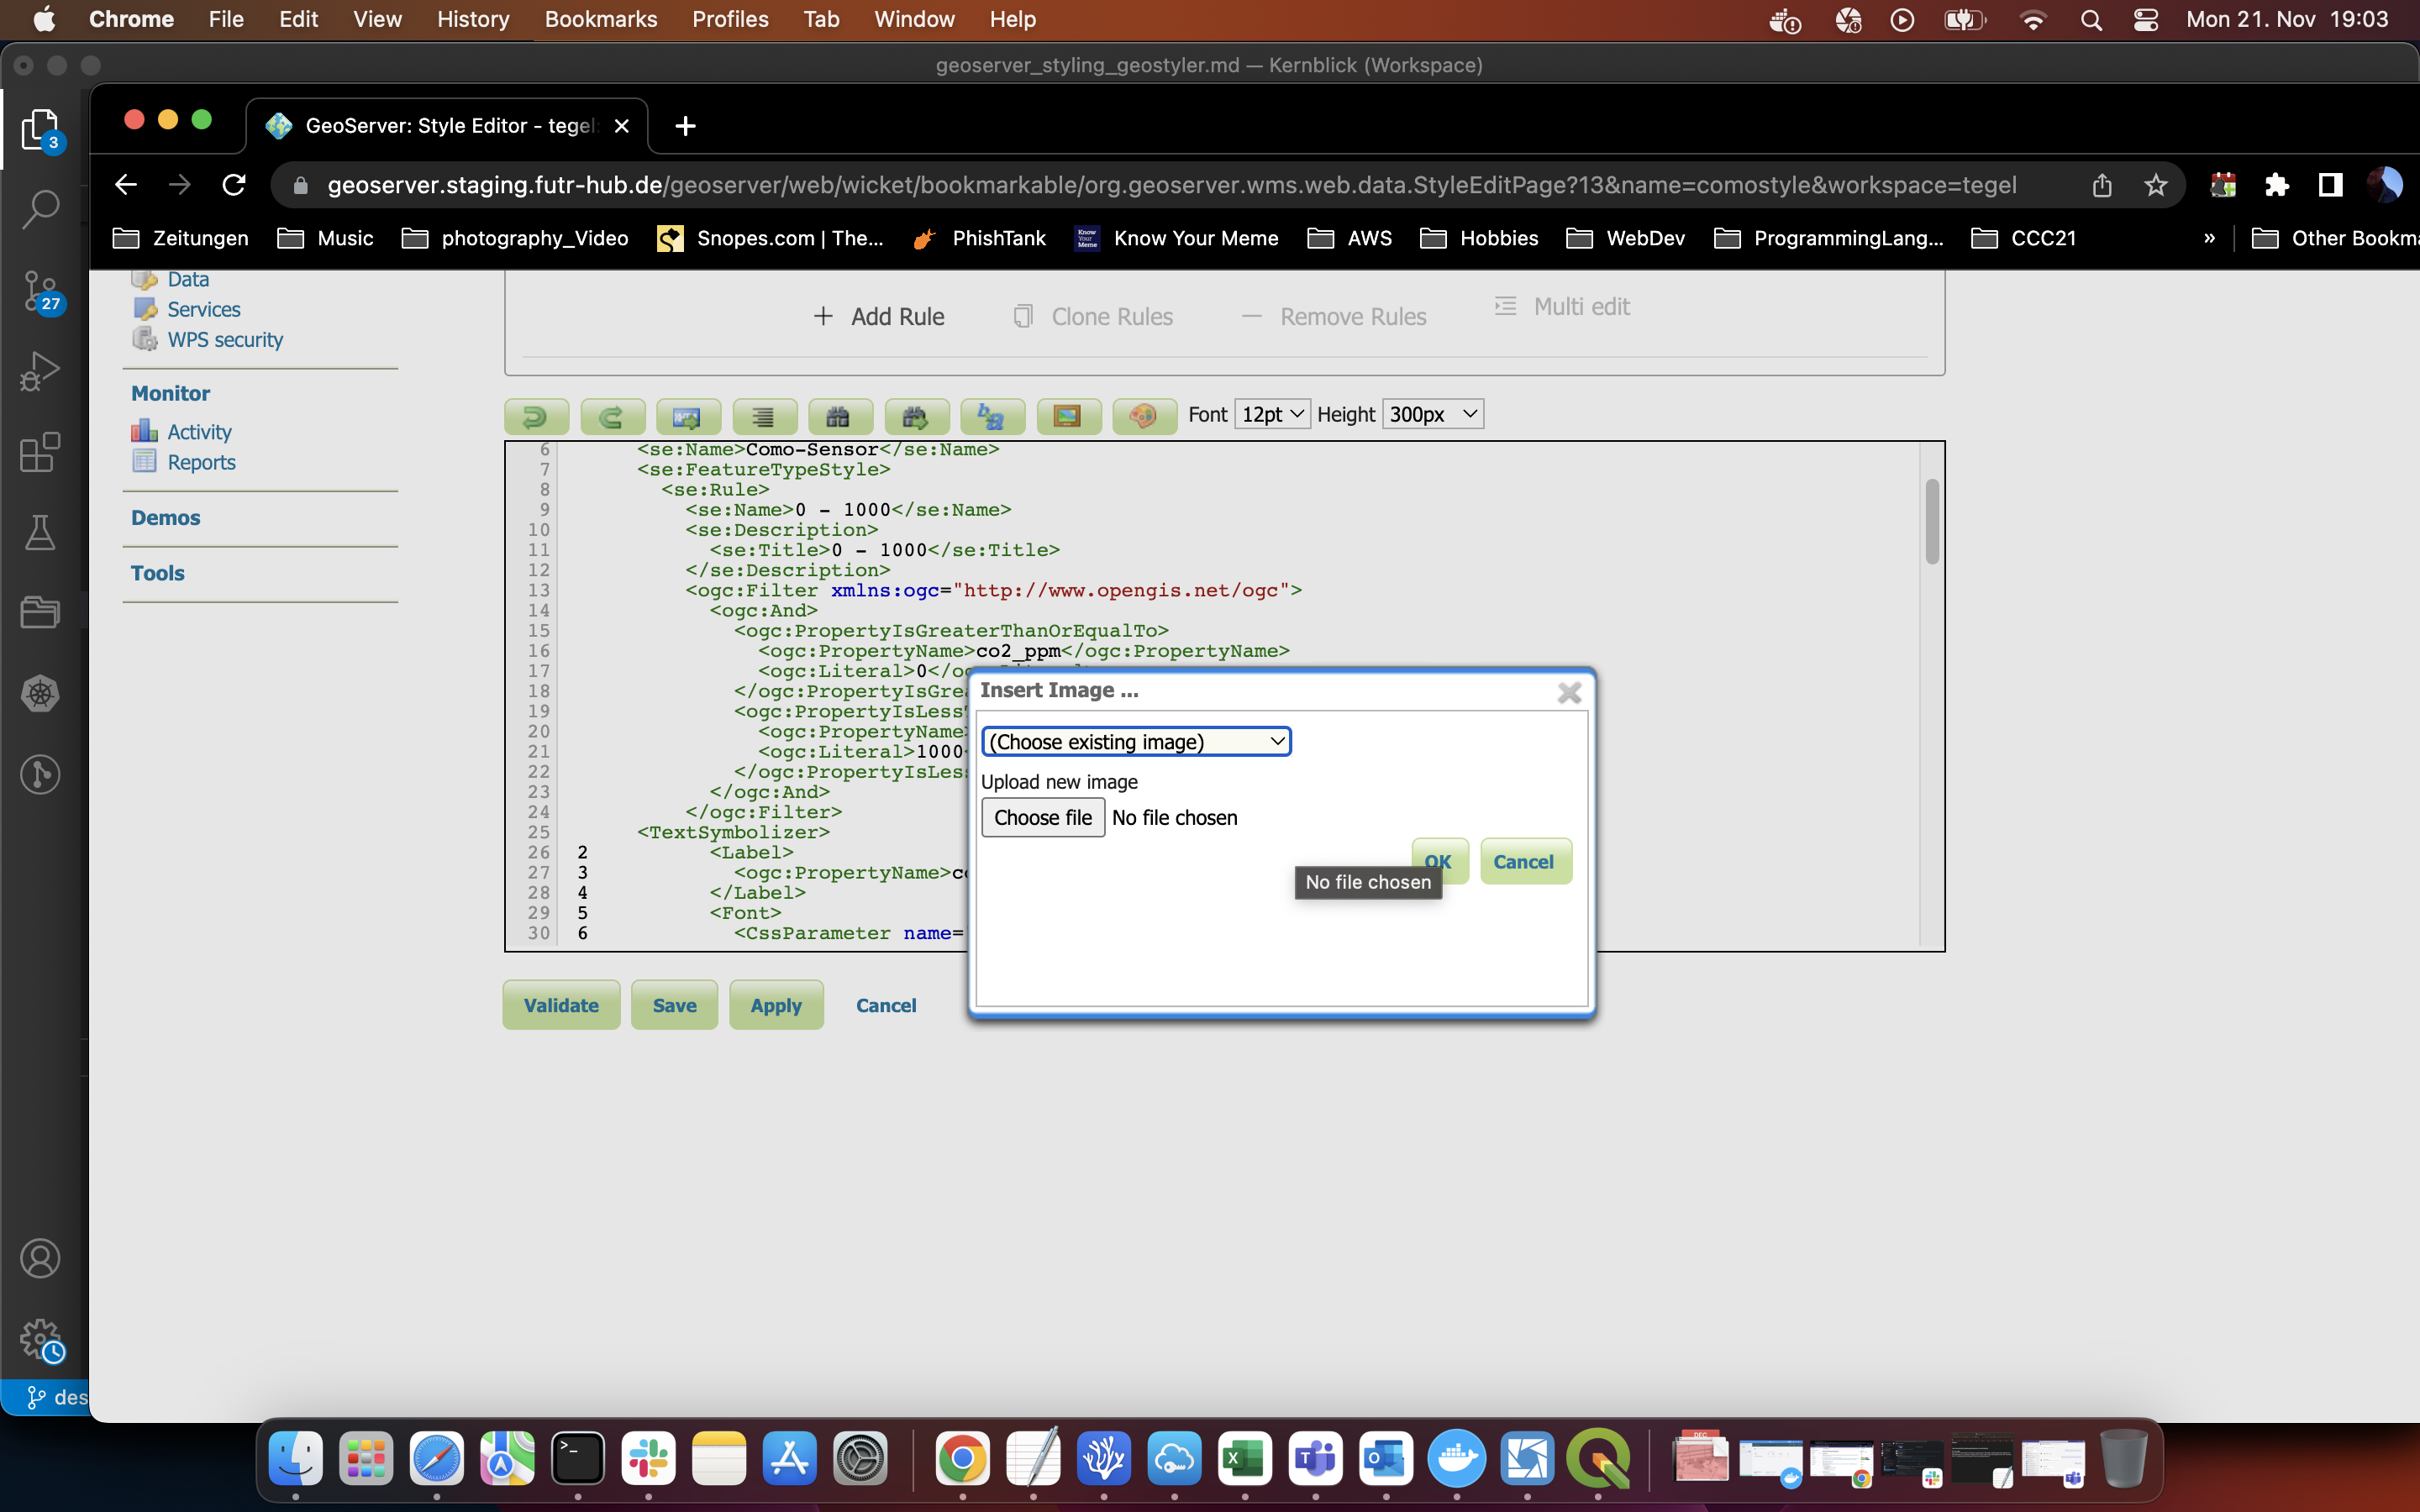
Once you are done the entire code snippet will be added into the xml text at the place where you postioned the cursor.
I placed the image within the TextSymbolizer tag more to the end of it.
See the example snippet to include an image here:
   <Graphic>
              <ExternalGraphic xmlns="http://www.opengis.net/sld" xmlns:xlink="http://www.w3.org/1999/xlink">
                <OnlineResource xlink:type="simple" xlink:href="ComoSensorMarker-blue.png" />
                <Format>image/png</Format>
              </ExternalGraphic>
		</Graphic>
    </TextSymbolizer>
You can make further changes to your style as you wish.
You can validate your code by clicking on "Validate", when the code is okay hit "Save"
Don't forget to give the style a name at the top of the page. Also make sure to select a workspace in which this style should be available.
Applying a Style to a layer
On the top of the page select the "Publishing" tab. In the search field you can type in the name of your layer or search it from the list.
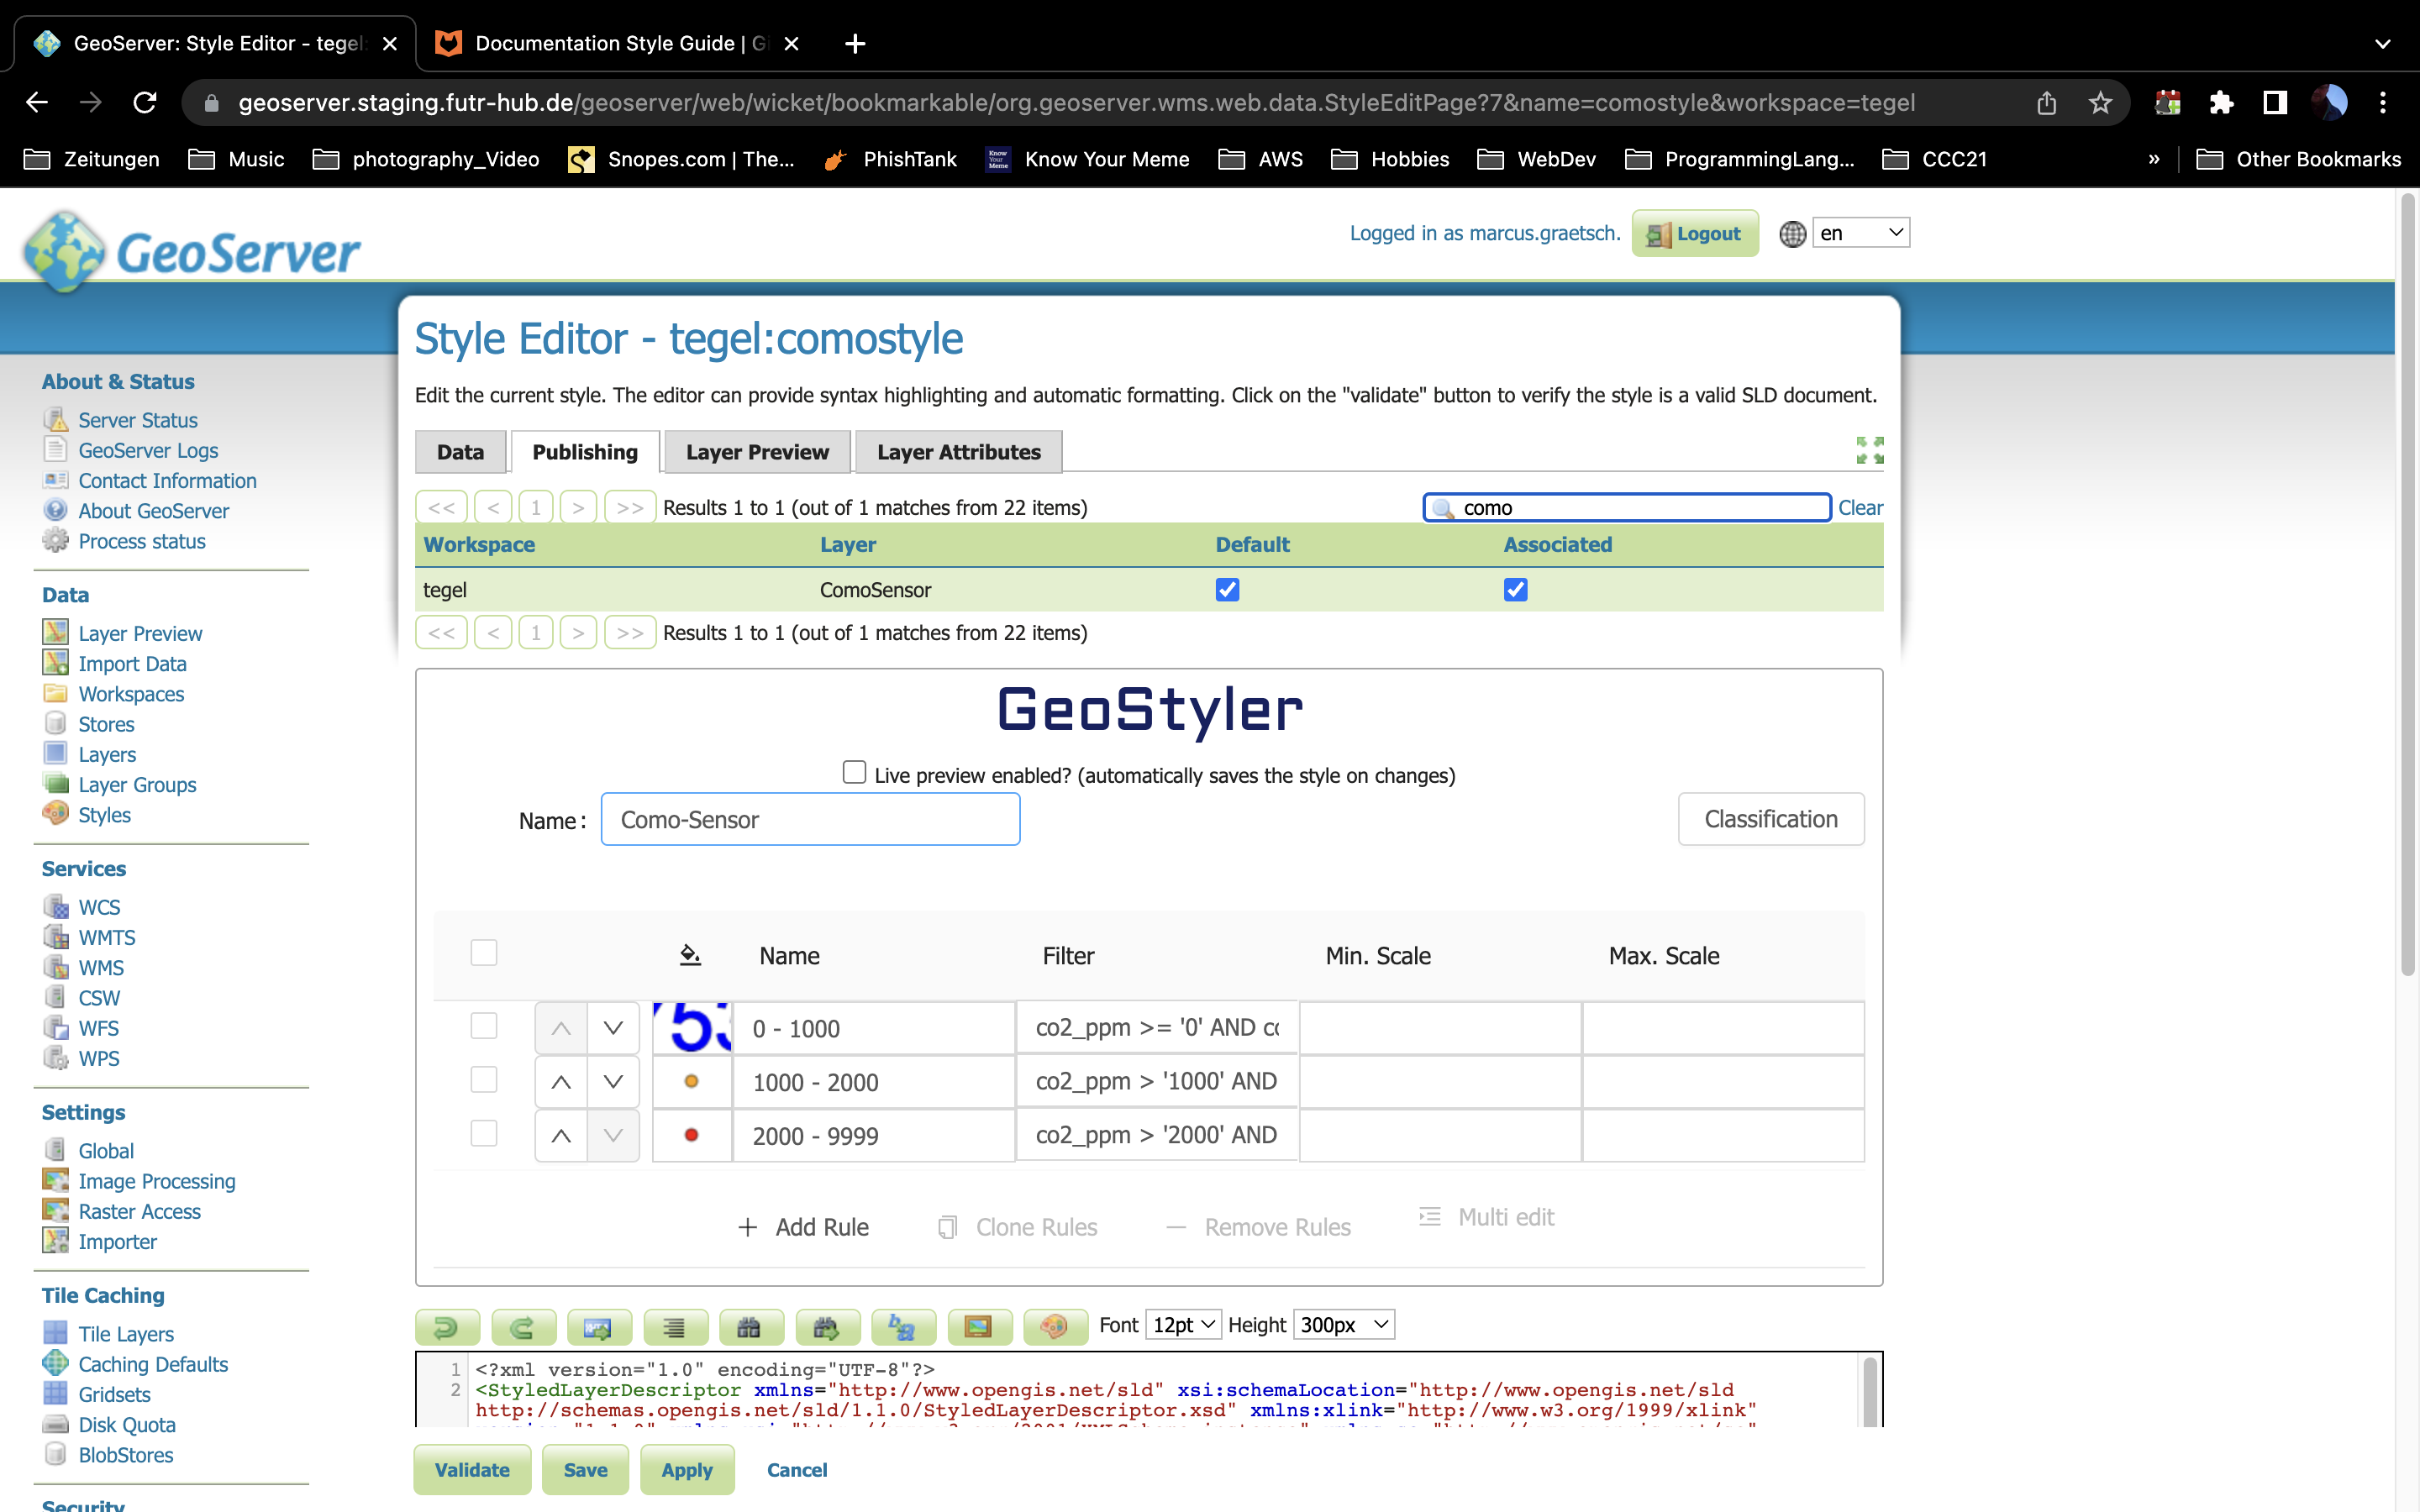
To publish the style to your selected layer(s) click the empty box under the "Default" and "Associated" column name.
After this you can save the style and/or you select the "Layer Preview" tab and see how the style looks on your layer.
Make changes again when you need to, "Layer Preview" gives you a good overview of what your SLD XML Style code does to the design of how your layer will display later on.